
How to Compress an Image to 50KB Without Losing Quality
Learn how to compress an image to 50KB without losing quality using resizing, compression, WebP, JPG, and practical online image optimization techniques.
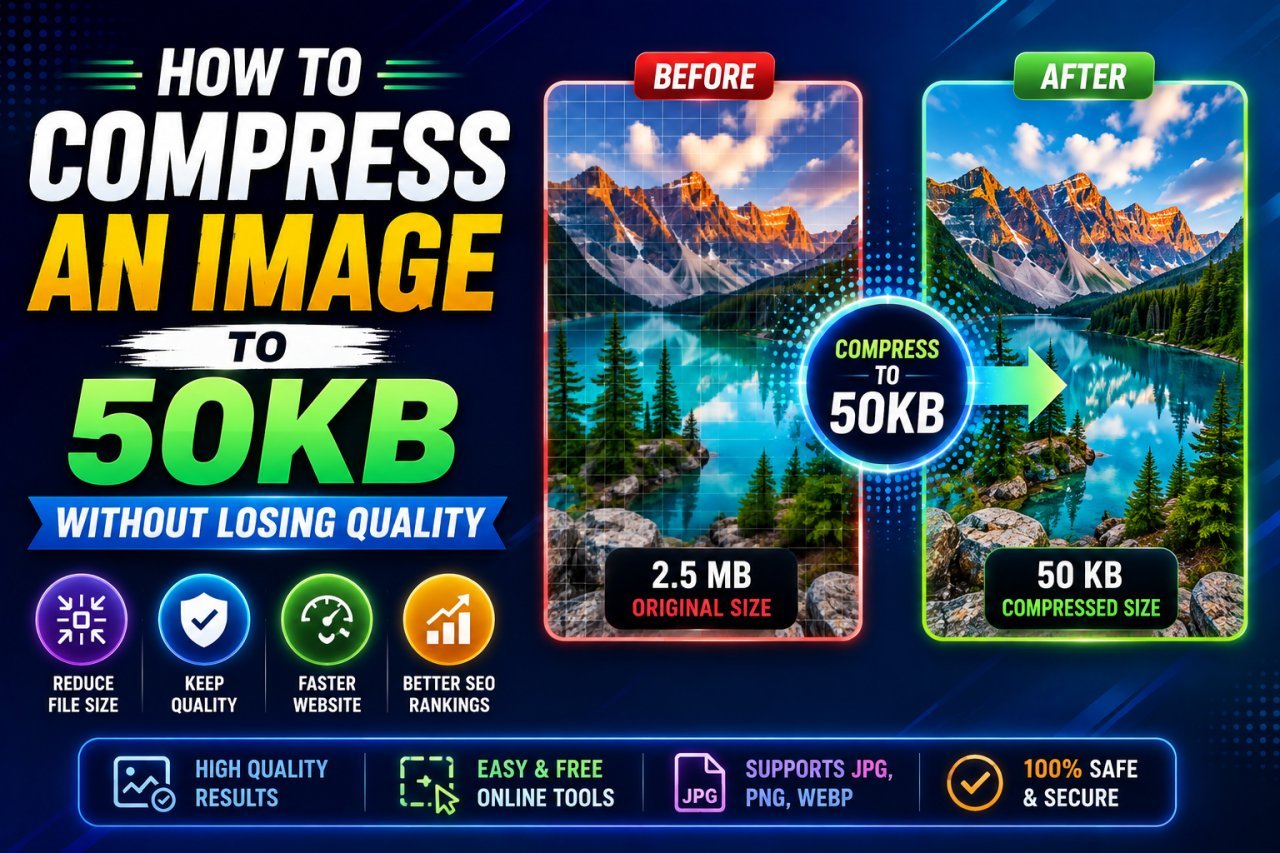
How to Compress an Image to 50KB Without Losing Quality
Introduction
Need to upload an image that must be 50KB or smaller?
Whether you are submitting a passport photo, uploading a profile picture, preparing an image for an online form, optimizing a website, or trying to meet a specific file-size limit, getting an image down to 50KB can be surprisingly difficult.
You may reduce the quality and end up with a blurry image.
Or you may compress it several times and still see a file size such as 120KB, 80KB, or 65KB.
The good news is that you do not always need to destroy image quality just to reach a smaller file size.
The key is to optimize the image in the right order:
Resize → Choose the right format → Compress → Check quality → Fine-tune
This guide explains how to compress an image to 50KB without losing noticeable quality, what settings to use, which formats work best, and what to do when normal compression is not enough.
What Does “Compress an Image to 50KB” Mean?
When someone asks you to make an image 50KB, they usually mean that the final image file should be around 50 kilobytes or below a particular upload limit.
For example:
- Original image: 2.4MB
- After resizing: 450KB
- After compression: 120KB
- Final optimization: 48KB
The important point is that image dimensions and file size are different things.
An image can have small dimensions but still have a relatively large file size.
Likewise, a large-dimension image can sometimes be surprisingly small if it contains simple visual information and is efficiently compressed.
That is why simply changing the quality slider is not always enough.
Why Is It Difficult to Make an Image Exactly 50KB?
Images contain different amounts of visual information.
A simple graphic with a plain background may compress extremely well.
A detailed photograph containing:
- Hair
- Grass
- Trees
- Textures
- Shadows
- Gradients
- Fine patterns
may require more data to maintain acceptable quality.
For example, two images can both be:
1200 × 800 pixels
but one might compress to 45KB while another remains above 100KB.
The difference comes from the image's content and compression characteristics.
So there is no single quality percentage that will make every image exactly 50KB.
The Best Way to Reach 50KB
If your goal is a file of approximately 50KB, do not immediately set image quality to the lowest possible level.
Use this order instead:
Step 1: Check the Original Image
Find out:
- Current file size
- Width
- Height
- Current format
Step 2: Resize the Image
Reduce unnecessary dimensions if the image is much larger than required.
Step 3: Choose an Efficient Format
Depending on the image, JPG or WebP may produce a much smaller file than PNG.
Step 4: Compress
Use a suitable compression level.
Step 5: Check the Result
Make sure the image still looks good at its intended display size.
Step 6: Fine-Tune
If the image is still above 50KB, slightly reduce dimensions or compression quality.
This approach usually produces a better result than aggressively compressing the original.
1. Start by Resizing the Image
One of the most effective ways to reduce image size is to reduce its dimensions.
Suppose your original image is:
4000 × 3000 pixels
but the website only needs:
800 × 600 pixels
Uploading the original may be unnecessary.
A smaller version can contain dramatically less image data.
Example
| Version | Dimensions | Example File Size |
|---|---|---|
| Original | 4000 × 3000 | 2.5MB |
| Resized | 2000 × 1500 | 700KB |
| Smaller | 1200 × 900 | 220KB |
| Optimized | 800 × 600 | 45–70KB |
These numbers are examples, not guaranteed results.
The final size depends on the image itself and the compression settings.
2. Do Not Reduce Dimensions More Than Necessary
There is an important balance here.
If an application requires an image to be at least a certain resolution, reducing the image too much can cause a different problem.
For example, suppose an online application requires a photo with a minimum width of 600 pixels.
Reducing it to 200 pixels just to reach 50KB may make the upload invalid or visibly poor.
Before resizing, check the requirements of the website or application.
Look for requirements such as:
- Maximum file size
- Minimum dimensions
- Maximum dimensions
- Required format
- Aspect ratio
- Background requirements
Always follow the upload requirements first.
3. Choose JPG for Many Photographs
If your image is a normal photograph, JPG is often a practical format for reaching a small file size.
JPG uses lossy compression, which means some image information is discarded to make the file smaller.
At reasonable settings, the visual difference may be difficult to notice.
JPG can work well for:
- Passport-style photos
- Profile photos
- Travel photographs
- Product photos
- Blog images
- Screenshots containing photographic content
However, JPG is not ideal for every type of image.
4. When PNG Is the Wrong Choice
PNG is excellent for certain graphics, especially when transparency or lossless image data matters.
But PNG can become unnecessarily large for detailed photographs.
Imagine you have a portrait photo that is 1.5MB as a PNG.
Converting it to an appropriately compressed JPG could reduce the file size significantly while keeping it visually acceptable.
PNG is Often Better For
- Logos
- Transparent graphics
- Simple illustrations
- Certain screenshots
- Graphics requiring lossless compression
JPG is Often Better For
- Photographs
- Portraits
- Landscapes
- Product photography
- Images with many colors
The image type should determine the format.
5. Consider WebP
WebP is another option when your destination supports it.
It can provide efficient compression for many photographs and graphics.
For a web-based application, website, blog, or online project, WebP can be worth testing.
For example:
JPG: 72KB
WebP: 48KB
The exact result will vary from image to image.
Do not assume WebP will always be smaller.
Convert the image and compare the actual result.
6. Reduce Image Quality Gradually
Once the dimensions and format are appropriate, adjust compression quality.
Do not immediately use the lowest quality setting.
Try a gradual approach:
90% → 80% → 70% → 60%
Then compare the results.
For a photograph, a moderate quality setting can sometimes provide a good balance between appearance and file size.
The exact quality percentage is not universal because different tools use different compression systems.
A "70" in one application may not produce the same result as "70" in another.
So judge the final image rather than relying only on the number.
7. Use the 50KB Target as a Practical Goal
If an upload form says:
Maximum file size: 50KB
you should aim to stay safely below the limit rather than trying to produce a file that is exactly 50.00KB.
For example:
49KB is generally more useful than trying to hit exactly 50KB and accidentally ending up at 51KB.
If the requirement says "50KB maximum," a practical target could be somewhere below that threshold.
Always check whether the website defines KB using decimal or binary units and whether its upload validation has any special rules.
8. Check the Image After Compression
Never assume an image is acceptable just because the file size is small.
Open the compressed version and inspect it.
Look closely at:
- Face details
- Eyes
- Hair
- Text
- Edges
- Fine lines
- Shadows
- Skin tones
- Background details
If you notice obvious artifacts, try a slightly larger file.
Remember:
The goal is not simply 50KB.
The goal is:
The smallest file that still looks good enough for its intended purpose.
How to Compress an Image to 50KB: Quick Method
If you need a simple process, use this:
1. Open the image
Start with the original file.
2. Check the dimensions
Find out whether the image is unnecessarily large.
3. Resize it
Reduce the dimensions while maintaining the required aspect ratio.
4. Select JPG or WebP
Use an efficient format when appropriate.
5. Compress
Start with moderate compression.
6. Check the file size
If it is still above 50KB, optimize further.
7. Inspect quality
Zoom in and check important details.
8. Repeat if necessary
Make small changes instead of one extreme change.
Example: Reducing a Photo From 1MB to 50KB
Imagine you have a portrait photo:
Original: 1.2MB
Dimensions: 3000 × 2000
Format: PNG
You need:
50KB or less
A sensible workflow could be:
Stage 1: Change the Format
Convert the photograph from PNG to JPG.
The file might immediately become much smaller.
Stage 2: Resize
Reduce the image to something more appropriate, such as 1000 × 667 pixels if the destination allows it.
Stage 3: Compress
Apply moderate JPG compression.
Stage 4: Check
Suppose the result is 75KB.
You still need to reduce it.
Stage 5: Fine-Tune
Try a slightly smaller dimension or slightly stronger compression.
Suppose the final result becomes:
47KB
Now check the visual quality.
If it still looks good for the intended use, you have achieved the goal without unnecessarily destroying the image.
50KB Image Compression: What Should You Change First?
When an image is too large, use this priority order:
| Priority | Change | Why |
|---|---|---|
| 1 | Remove unnecessary dimensions | Can significantly reduce image data |
| 2 | Choose a suitable format | Different formats compress differently |
| 3 | Adjust compression | Fine-tunes file size |
| 4 | Remove unnecessary metadata | May provide a smaller additional reduction |
| 5 | Make further small adjustments | Helps reach the final target |
This approach gives you more control.
What If the Image Is Still Above 50KB?
Do not panic.
If the image is 85KB after normal compression, you have several options.
Option 1: Reduce Dimensions Slightly
For example:
1200 × 800 → 1000 × 667
Option 2: Increase Compression
Lower the quality gradually and check the image.
Option 3: Try Another Format
Compare JPG and WebP if your destination supports both.
Option 4: Crop Unnecessary Areas
Removing a large amount of irrelevant background can reduce the image dimensions and file size.
Option 5: Remove Unnecessary Metadata
This may provide a small additional reduction.
The best choice depends on the image and the upload requirements.
Important: Do Not Keep Compressing the Same File
Repeatedly opening and saving an already compressed JPG can cause additional quality loss.
Instead, keep the original high-quality file.
Then create a new optimized version from the original.
Better Workflow
Original → Resize → Compress → Final 50KB version
Keep the original untouched for future edits.
What About a 50KB Passport Photo?
Passport and application photos often have strict requirements.
The exact rules vary by country, organization, application, and website.
You may be required to meet several conditions at once:
- File size
- Image dimensions
- Aspect ratio
- Background
- Face position
- Lighting
- Format
If a form says the photo must be 50KB or less, reducing the file size is only one part of the process.
Do not sacrifice the required dimensions or visual requirements just to hit the file-size limit.
Always read the application's official photo instructions before finalizing the image.
The Golden Rule
If you remember only one thing from this guide, remember this:
Do not try to reach 50KB by destroying image quality.
Instead:
Resize intelligently → Choose the right format → Compress gradually → Check the result → Fine-tune
This gives you much more control over both file size and image appearance.
How to Compress an Image to 50KB Without Losing Quality
Advanced Ways to Reach a 50KB Image File
Getting an image below 50KB becomes easier when you stop relying on a single compression setting.
The most effective approach is to combine several small optimizations.
For example:
Large original → Resize → Convert → Compress → Check → Fine-tune
Instead of aggressively lowering image quality, each step removes unnecessary file weight while protecting the parts of the image that matter.
9. Crop the Image Before Compressing It
Cropping can be surprisingly effective.
Suppose you have a portrait where half of the image is unnecessary background.
Instead of compressing the entire image, crop the unnecessary area first.
For example:
Before: 2000 × 1500 pixels
After: 1200 × 1200 pixels
You have removed a substantial amount of visual information before compression even begins.
Crop When:
- The subject occupies only a small part of the image.
- There is unnecessary empty space.
- The website requires a specific aspect ratio.
- A background does not contribute anything useful.
Do not crop important details simply to reduce the file size.
10. Keep the Correct Aspect Ratio
When resizing an image, maintain its original aspect ratio unless the destination specifically requires a different crop.
For example:
Original: 1600 × 1000
A proportional resize could be:
800 × 500
But changing it to:
800 × 800
without cropping will distort the image.
A stretched face, logo, or product can look noticeably wrong even when the file is only 50KB.
Better Workflow
Crop first → Resize proportionally → Compress
This keeps the image visually natural.
11. Try WebP When the Destination Supports It
If you are optimizing an image for a website and WebP is accepted, compare it with JPG.
For example:
| Version | Example Size | Visual Result |
|---|---|---|
| PNG | 310KB | Very good |
| JPG | 72KB | Good |
| WebP | 49KB | Good |
| Heavily compressed JPG | 38KB | Noticeable artifacts |
These are example results, not fixed values.
The right choice depends on the actual image.
The important lesson is that format selection can sometimes make a bigger difference than repeatedly changing the quality slider.
12. Use JPG Quality Carefully
If JPG is the required format, start with a moderate quality level.
A practical testing range might be around:
60–85
But this is only a starting point.
Different images behave differently.
A detailed photograph may need a higher setting, while a simple image may remain acceptable at a lower setting.
Instead of asking:
"What is the perfect JPG quality for 50KB?"
ask:
"What is the lowest quality that still looks good for this image?"
That question produces much more reliable results.
13. Compare Quality at Normal Viewing Size
One common mistake is judging a compressed image while zoomed to 500%.
At extreme zoom, almost every compressed image can reveal artifacts.
Instead, check it at the size visitors will actually see.
For example, if a profile photo will appear at approximately 200 × 200 pixels, check the optimized version around that size.
If it looks clean and recognizable there, minor artifacts that are invisible at normal viewing size may not matter.
However, for professional photography, printing, detailed graphics, or images containing small text, inspect more carefully.
14. Be Careful With Images Containing Text
Photographs usually tolerate compression better than text-heavy graphics.
Imagine a screenshot containing:
- Small letters
- Numbers
- Tables
- Software menus
- Thin lines
Aggressive JPG compression may create blurry edges around the text.
For these images, PNG, WebP, or another suitable format may produce a better result.
If a website requires 50KB, you may need to resize the screenshot carefully while preserving enough resolution for the text to remain readable.
15. Use Grayscale When Color Is Not Necessary
For certain documents or simple images, converting a color image to grayscale can reduce the amount of information that needs to be stored.
This can be useful for:
- Scanned documents
- Black-and-white forms
- Simple text images
- Monochrome graphics
But do not remove color from a photograph when color is important to the intended result.
The goal is always to remove information that is unnecessary—not information that gives the image meaning.
16. Remove Unnecessary Metadata
Images can contain metadata such as:
- Camera information
- Software information
- Location data
- Date information
- Editing information
Some metadata may not be needed for online use.
Removing unnecessary metadata can reduce file size slightly.
However, metadata can sometimes have legitimate purposes, so check what your workflow removes.
If privacy matters, reviewing embedded location metadata can also be useful before publishing personal photographs.
17. Don't Use the Same Settings for Every Image
There is no universal "50KB setting."
Consider these examples:
Portrait
May work well with JPG or WebP.
Logo
May work better as SVG or PNG depending on its design and requirements.
Screenshot
May need sharper compression settings to keep text readable.
Product Photo
May require enough quality to preserve product details.
Document Scan
May benefit from grayscale or a format designed for sharp edges and text.
The correct optimization strategy depends on what the image contains.
JPG vs PNG vs WebP for a 50KB Target
| Feature | JPG | PNG | WebP |
|---|---|---|---|
| Photographs | Excellent | Usually inefficient | Excellent |
| Transparency | No | Yes | Yes |
| Small file sizes | Often good | Often difficult for photos | Often good |
| Text graphics | Can blur when compressed | Strong | Can be strong |
| Web use | Very common | Common | Very useful |
| Lossy compression | Yes | No | Yes |
| Lossless compression | No | Yes | Yes |
There is no universal winner.
For a photograph that needs to reach 50KB, JPG and WebP are often worth comparing.
For transparent graphics or certain sharp-edged images, PNG or WebP may be more appropriate.
What Is the Best Resolution for a 50KB Image?
There is no single resolution that guarantees a 50KB file.
A useful starting point depends on where the image will be used.
For example:
| Use Case | Possible Starting Point |
|---|---|
| Small profile image | 300–500px wide |
| Thumbnail | 400–800px wide |
| Website content image | 800–1200px wide |
| Small document preview | Depends on text readability |
| Application photo | Follow the application's exact requirements |
These are starting ranges, not universal rules.
If an upload form specifies dimensions, always follow those requirements instead.
How to Compress an Image to Exactly 50KB
Sometimes a website asks for a file under 50KB, while another system may specifically ask for a file around a certain size.
If you genuinely need to get very close to 50KB, use an iterative approach.
Step 1
Create an appropriately sized version.
Step 2
Compress it.
Step 3
Check the file size.
Step 4
If it is 65KB, make a small adjustment.
Step 5
Export again.
Step 6
Check the new size.
Repeat until you reach an acceptable result.
For example:
65KB → 57KB → 51KB → 48KB
This is much safer than making one huge quality reduction.
What to Do If Your Image Is 51KB
If the requirement is 50KB maximum, 51KB is technically above the limit.
You only need a small additional reduction.
Try one of these:
- Reduce the quality slightly.
- Reduce the width by a small amount.
- Remove unnecessary metadata.
- Try WebP if supported.
- Crop a small unnecessary area.
Do not reduce the image dramatically.
A 51KB image does not require a complete re-edit.
What to Do If Your Image Is 500KB
A 500KB image needs a larger reduction.
Start by checking its dimensions.
If it is something like:
3000 × 2000 pixels
and the destination only needs:
800 × 533 pixels
resize it first.
Then convert it to an appropriate format and compress it.
Reducing dimensions can be much more effective than simply pushing JPG quality lower and lower.
What to Do If Your Image Is Already 55KB
This is a much easier problem.
You may only need a small adjustment.
Try:
55KB → 50KB
with a minor quality or dimension change.
Do not unnecessarily reduce a 55KB image to 20KB.
If the requirement is 50KB, there is no reason to throw away additional visual quality without a purpose.
How to Compress a PNG to 50KB
PNG files can be difficult to reduce to 50KB when they contain complex photographs.
Try this workflow:
For a Photograph
PNG → JPG/WebP → Resize → Compress
For a Simple Graphic
PNG → Optimize → Reduce unnecessary dimensions → Check transparency requirements
For a Logo
Consider whether SVG is suitable.
If the destination requires PNG, keep PNG but optimize the dimensions and unnecessary data.
How to Compress a JPG to 50KB
For a JPG photograph:
- Check the dimensions.
- Crop unnecessary areas.
- Resize proportionally.
- Adjust JPG quality.
- Export.
- Check file size.
- Inspect the image.
- Make another small adjustment if necessary.
Avoid repeatedly saving the same compressed JPG.
Use the original image as your source whenever possible.
How to Compress a WebP to 50KB
If you already have a WebP image and need it below 50KB:
- Check its dimensions.
- Remove unnecessary cropping space.
- Adjust quality.
- Export again.
- Check the result.
- Compare it visually with the previous version.
Because WebP is already designed for efficient web delivery, further reductions may require a trade-off between quality and size.
Common Mistakes When Trying to Reach 50KB
Mistake 1: Only Changing Quality
Lowering quality is not the only way to reduce file size.
Better: Resize first when appropriate.
Mistake 2: Ignoring Image Dimensions
A huge image may remain large even after compression.
Better: Check width and height.
Mistake 3: Using PNG for Every Photo
PNG can produce unnecessarily large photographic files.
Better: Compare JPG or WebP.
Mistake 4: Compressing Too Aggressively
The image reaches 30KB but looks terrible.
Better: Aim for the smallest acceptable file.
Mistake 5: Saving an Already Compressed JPG Again and Again
Repeated editing can introduce additional quality loss.
Better: Start from the original.
Mistake 6: Ignoring Upload Requirements
You may reach 50KB but accidentally violate a minimum-dimension requirement.
Better: Check the destination's specifications first.
Mistake 7: Forgetting Transparency
Converting a transparent PNG to JPG removes transparency.
Better: Use a format that supports transparency when it is required.
Mistake 8: Using a Random Online Compressor Without Checking the Result
Different tools use different compression methods.
Better: Compare the final file size and visual quality.
50KB Image Compression: Best Practices
For consistent results, follow these principles.
Keep an Original
Always preserve the original high-quality file.
Resize Before Heavy Compression
Do not make compression do all the work.
Use the Correct Format
Choose based on the image, not simply popularity.
Compress Gradually
Make small changes and check the result.
Stay Below the Upload Limit
If the maximum is 50KB, avoid targeting exactly 50KB.
Check Visual Quality
Look at the actual image, not just the file size.
Follow Required Dimensions
File size is only one upload requirement.
Avoid Repeated Lossy Saves
Create the final version from the original whenever possible.
A Fast 50KB Workflow for Beginners
If you need the simplest possible method, follow this sequence:
1. Open your image
↓
2. Check its dimensions
↓
3. Crop unnecessary areas
↓
4. Resize it
↓
5. Choose JPG or WebP when appropriate
↓
6. Compress moderately
↓
7. Check the file size
↓
8. If above 50KB, reduce slightly
↓
9. Inspect quality
↓
10. Save the final version
This method works for many common photographs and website images.
A Better Way to Think About Image Quality
"Without losing quality" does not always mean that the compressed file must contain exactly the same information as the original.
Lossy formats deliberately remove some information.
What matters is whether the visible result remains suitable for the intended use.
For example, a 2MB photograph may contain far more information than a small profile image needs.
Reducing that image to 50KB may remove some data while still leaving a clear and useful photo.
That is why visual quality should be judged according to the purpose of the image.
When You Should Not Force an Image to 50KB
Sometimes 50KB is simply too restrictive for the image and its intended purpose.
For example, a detailed photograph intended for large display may require more data to remain visually useful.
Similarly, a document containing tiny text may become unreadable if compressed too aggressively.
If the destination does not actually require 50KB, do not choose 50KB arbitrarily.
Use a file size appropriate to the image and its purpose.
Final 50KB Compression Checklist
Before uploading your image, check:
- File size is below the required limit.
- Dimensions meet the destination requirements.
- Correct format is being used.
- Image is still clear.
- Important details are readable.
- Aspect ratio is correct.
- Unnecessary background has been removed.
- The original file has been preserved.
- The image was checked at normal viewing size.
- The final file opens correctly.
Conclusion
Compressing an image to 50KB does not have to mean turning it into a blurry, unusable file.
The biggest mistake is treating compression as a single quality slider.
Instead, look at the whole image.
Start with the dimensions.
Remove unnecessary areas.
Choose an appropriate format.
Compress gradually.
Then check the actual result.
For many photographs, a workflow such as:
Resize → JPG/WebP → Moderate compression → Check → Fine-tune
can produce a much better balance between file size and image quality.
And remember: if the requirement says 50KB maximum, aim slightly below the limit rather than trying to hit the exact number.
The right result is not necessarily the smallest possible file.
It is the smallest practical file that still looks good and satisfies the upload requirements.
Key Takeaways
- Resize before aggressively compressing whenever the image is larger than necessary.
- JPG and WebP are worth testing for many photographs.
- PNG remains useful for transparency and certain graphics.
- There is no universal resolution or quality setting that guarantees 50KB.
- Make small adjustments instead of destroying quality in one step.
- Always check the destination's file-size and dimension requirements.
- Keep the original image so you can create a better optimized version later.
- If the limit is 50KB, staying slightly below it is safer than targeting exactly 50KB.
- Check visual quality at the size the image will actually be used.
- A successful 50KB image is one that meets the requirement without sacrificing more quality than necessary.
Frequently Asked Questions
1. How can I compress an image to 50KB without losing quality?
Resize the image to an appropriate dimension, choose a suitable format such as JPG or WebP for many photographs, apply moderate compression, and gradually fine-tune the result until it falls below 50KB.
2. What is the best image format for a 50KB photo?
For many photographs, JPG or WebP can be practical choices. The better option depends on the destination, image content, required transparency, and the final visual quality.
3. How do I reduce a 1MB image to 50KB?
Start by checking the image dimensions. Resize it if it is unnecessarily large, choose an efficient format, compress it, and then make smaller adjustments until the file reaches the required size.
4. Can I compress a JPG to exactly 50KB?
You can get close to a specific file size by repeatedly adjusting dimensions or compression settings. If the requirement is a maximum of 50KB, it is safer to stay slightly below the limit.
5. Why is my image still larger than 50KB after compression?
The image may have large dimensions, contain complex visual detail, use an inefficient format, or still contain unnecessary data. Try resizing it and comparing a more suitable format.
6. What resolution should an image be for 50KB?
There is no universal resolution that guarantees 50KB. The appropriate dimensions depend on where the image will be used and whether the destination specifies minimum or maximum dimensions.
7. Can I compress a PNG photo to 50KB?
Yes, but photographs saved as PNG can be difficult to reduce to 50KB without noticeable quality loss. Converting a photograph to JPG or WebP may produce a better balance if the destination allows it.
8. Does reducing image dimensions reduce file size?
Usually, reducing dimensions can significantly reduce the amount of image data that needs to be stored. The exact reduction depends on the image content and format.
9. Why does my 50KB image look blurry?
The compression may be too aggressive, the dimensions may be too small, or the image may have been repeatedly saved using lossy compression. Try starting from the original and making smaller adjustments.
10. Should I make every website image 50KB?
No. A 50KB target only makes sense when there is a specific requirement or when it is appropriate for the image's intended use. Different images may need different file sizes. [All Tools](All Tools/tools) [Bulk Compressor](Bulk Compressor/bulk-compress)
Ready to optimize your images?
Every tool mentioned in this article is free to use. No upload, no signup, and no watermarks — ever.
Try our free toolsRelated articles
How to Reduce Image File Size Without Losing Quality: Complete Guide
Learn how to reduce image file size without losing quality using compression, resizing, format conversion, and practical optimization techniques. This beginner-friendly guide explains how to compress JPG, PNG, and WebP images for websites, email, social media, uploads, and everyday use.
How to Make an Image 100KB, 200KB, or 500KB Online
Learn how to make an image 100KB, 200KB, or 500KB online without making it look blurry. This guide explains how to resize and compress JPG, PNG, and WebP images to meet specific file-size limits.
How to Reduce Image Size in KB Without Losing Quality
Learn how to reduce image size in KB without losing quality using smart compression, resizing, format selection, and practical image optimization techniques.