
What Is Image Resolution? A Beginner’s Guide to Pixels, DPI and PPI
Learn what image resolution means, how pixels work, and the difference between DPI and PPI. A simple beginner’s guide with practical examples.
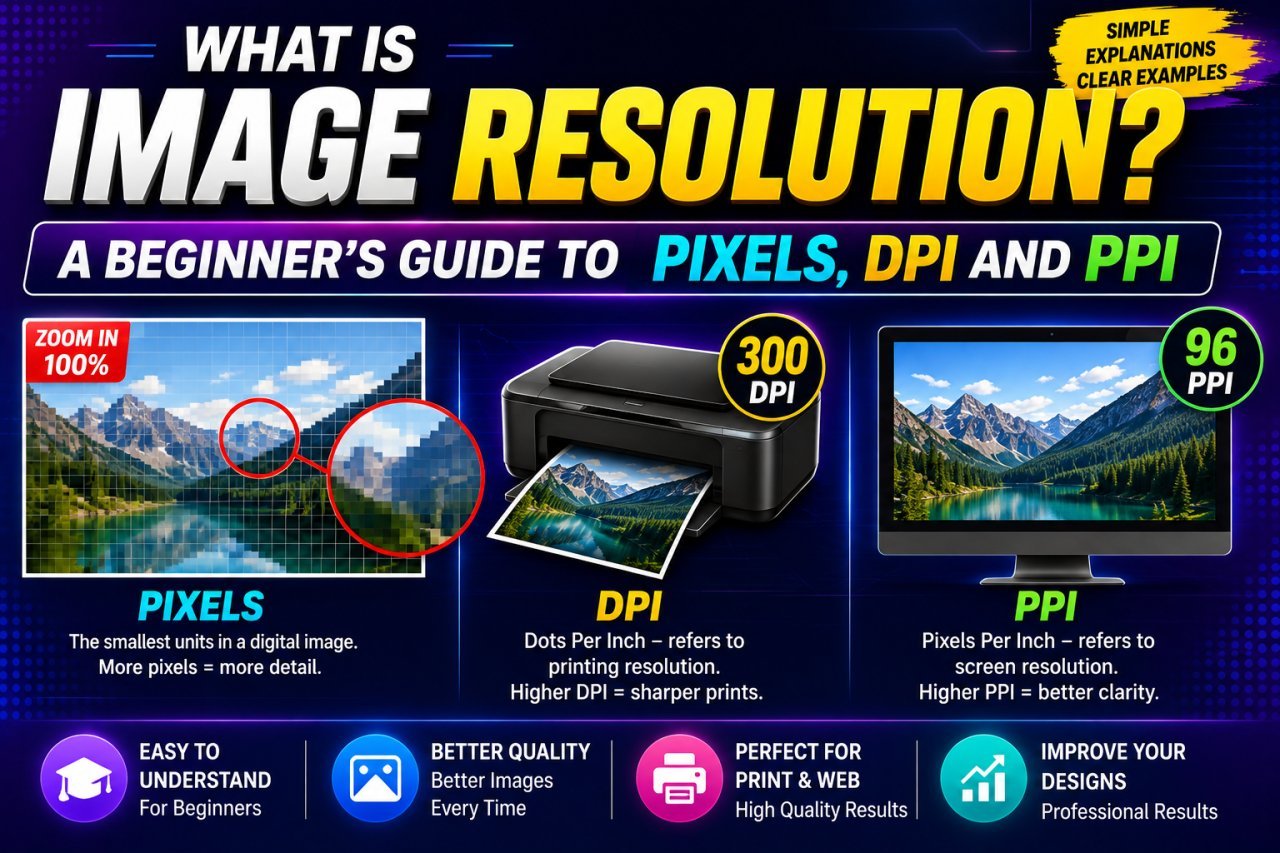
What Is Image Resolution? A Beginner’s Guide to Pixels, DPI and PPI
Introduction
If you have ever uploaded a photo, printed a picture, or resized an image, you have probably seen terms like resolution, pixels, DPI, and PPI.
But what do these terms actually mean?
If you are wondering what is image resolution, the simple answer is that it describes how much image information is available and, depending on the context, how that information is represented for digital display or physical output.
For digital images, pixel dimensions are especially important. A photo that is 3000 × 2000 pixels contains much more pixel information than an image that is 800 × 600 pixels.
DPI and PPI are related to resolution too, but they describe different things.
This guide explains the basics in simple language so you can understand image resolution without needing professional photography or graphic-design experience.
You will learn:
- What image resolution means
- What a pixel is
- What pixel dimensions mean
- What DPI means
- What PPI means
- The difference between DPI and PPI
- How resolution affects image quality
- How digital and printed resolution differ
- Why a higher resolution is not always better
- How to choose the right resolution for common uses
-> All Tools -> YouTube Thumbnail Enhancer
What Is Image Resolution?
Image resolution refers to the amount of visual information an image contains and, depending on the context, how that information is represented.
For a digital image, resolution is commonly discussed using its pixel dimensions.
For example:
1920 × 1080 pixels
means the image is:
- 1920 pixels wide
- 1080 pixels high
The total number of pixels is:
1920 × 1080 = 2,073,600 pixels
So this image contains more than two million pixels.
However, image resolution is not simply a matter of making one number bigger.
A photo's quality also depends on factors such as:
- Focus
- Lighting
- Camera sensor
- Lens quality
- Compression
- Noise
- Editing
- Original image quality
A large image can still look poor if the original photograph is blurry or heavily compressed.
What Is a Pixel?
A pixel is a small individual unit of a digital image.
Think of a digital photograph as a large grid made up of tiny pieces.
Each piece is a pixel.
When millions of these pixels are placed together, they form the complete photograph you see on your screen.
For example:
1000 × 1000 pixels
means the image contains:
1,000,000 pixels
Similarly:
4000 × 3000 pixels
contains:
12,000,000 pixels
The second image has significantly more pixels available.
Why Do Pixels Matter?
Pixels matter because they provide the digital information used to display an image.
Having more pixels can give you more flexibility when you need to:
- Crop an image
- Print it larger
- Resize it
- Use it in a high-resolution layout
- Preserve detail during certain editing tasks
But more pixels do not automatically guarantee a better-looking image.
A badly focused 4000 × 3000 photograph can still look worse than a sharp, well-exposed photograph with fewer pixels.
What Are Pixel Dimensions?
Pixel dimensions describe the width and height of an image in pixels.
For example:
| Image size | Width | Height | Total pixels |
|---|---|---|---|
| Small | 800 | 600 | 480,000 |
| HD | 1280 | 720 | 921,600 |
| Full HD | 1920 | 1080 | 2,073,600 |
| Large photo | 4000 | 3000 | 12,000,000 |
Pixel dimensions are particularly important for digital images.
If a website asks you to upload an image that is 1200 × 800 pixels, it is asking about the image's pixel dimensions.
Changing the DPI number alone does not necessarily satisfy that requirement.
Resolution vs Image Dimensions
These terms are often used interchangeably, but they are not always referring to exactly the same thing.
Image Dimensions
Image dimensions tell you how large the image is in pixels.
Example:
2000 × 1500 pixels
Resolution
Resolution can refer to pixel density or the amount of image information, depending on the context.
This is why resolution discussions can become confusing.
For digital images, people often use "resolution" when talking about pixel dimensions.
For printing, resolution may involve PPI and physical dimensions.
Understanding the context is important.
What Does DPI Mean?
DPI stands for dots per inch.
It technically describes how many physical dots an output device, such as a printer, can place within one inch.
For example, a printer may use a particular dot density to reproduce an image on paper.
DPI therefore relates primarily to the output device and its physical printing process.
However, you will often see DPI mentioned in image-editing software and online guides when people are talking about image print resolution.
This everyday usage can make the subject confusing.
The technical distinction is:
DPI = dots per inch
PPI = pixels per inch
What Does PPI Mean?
PPI stands for pixels per inch.
It describes how many image pixels are assigned to one inch of physical space.
PPI becomes especially useful when discussing printed image size.
For example, suppose you have an image that is:
3000 × 2000 pixels
At 300 PPI, the theoretical physical size is:
3000 ÷ 300 = 10 inches
and:
2000 ÷ 300 ≈ 6.67 inches
So the image corresponds to approximately:
10 × 6.67 inches at 300 PPI
The pixel dimensions have not necessarily changed.
The PPI setting determines how densely those pixels are represented for physical output.
DPI vs PPI: What Is the Difference?
This is one of the most common questions beginners have.
DPI
Dots per inch
DPI technically refers to the physical dots produced by a printer or other output device.
PPI
Pixels per inch
PPI refers to the density of pixels in the digital image when relating the image to physical dimensions.
Simple Comparison
| Term | Full form | What it describes |
|---|---|---|
| Pixel | Picture element | A unit of digital image information |
| PPI | Pixels per inch | Pixel density for physical dimensions |
| DPI | Dots per inch | Output-device dot density |
In casual conversations, people often say "DPI" when they really mean PPI.
If a printing service gives you specific instructions, follow its terminology and technical requirements.
Why Do People Confuse DPI and PPI?
The confusion partly comes from the way image-editing programs, printers, scanners, and design applications use these terms.
A software program may show a field labelled DPI when changing an image's print resolution.
A printer manufacturer may describe output capabilities using DPI.
A designer may talk about a photograph as being "300 DPI."
These terms can overlap in everyday usage even though their technical meanings differ.
For beginners, the most useful distinction is:
Pixels belong to the digital image.
PPI connects those pixels to physical dimensions.
DPI describes the physical output dots produced by a device.
Does Higher Resolution Always Mean Better Quality?
No.
This is an important misconception.
A higher pixel count can provide more image information, but it does not automatically make an image beautiful or sharp.
Imagine two photographs.
Photo A
4000 × 3000 pixels
But it is:
- Out of focus
- Poorly exposed
- Heavily compressed
Photo B
2000 × 1500 pixels
But it is:
- Sharp
- Well exposed
- Properly processed
- Saved with good quality
Photo B may look better in many situations.
Resolution is only one part of image quality.
What Determines Image Quality?
Several factors can affect how an image looks.
1. Pixel Dimensions
More pixels can provide more available image information.
2. Focus
A high-resolution image that is out of focus cannot necessarily be fixed by adding pixels.
3. Lighting
Poor lighting can introduce noise, shadows, or loss of detail.
4. Compression
Strong compression can remove visual information and create artifacts.
5. Camera or Source Quality
The original capture has a major influence on the final result.
6. Editing
Repeated resizing, sharpening, compression, or other processing can affect the image.
7. Viewing Size
An image may look excellent at one size but show weaknesses when enlarged substantially.
What Happens When You Increase Image Resolution?
Increasing resolution can mean different things.
You might:
- Increase the pixel dimensions
- Change the PPI setting
- Change both
These actions are not identical.
Changing PPI Without Resampling
Suppose your image is:
1200 × 800 pixels at 72 PPI
You change it to:
1200 × 800 pixels at 300 PPI
If you do not resample the image, the pixel dimensions remain:
1200 × 800
No new image pixels have been created.
The physical size associated with those pixels changes.
Increasing Pixel Dimensions
Suppose you change:
1200 × 800 pixels
to:
2400 × 1600 pixels
Now the number of pixels has increased.
The software has to generate additional pixels through a resampling process.
This is sometimes called upscaling.
What Is Resampling?
Resampling means changing the number of pixels in an image.
There are two basic directions.
Upsampling
Increasing pixel dimensions.
Example:
1000 × 750 → 2000 × 1500
Downsampling
Reducing pixel dimensions.
Example:
4000 × 3000 → 2000 × 1500
Downsampling removes image pixels.
Upsampling creates estimated pixels based on the information available in the original.
Can Increasing Resolution Make a Blurry Image Sharp?
Not automatically.
Suppose you have a small image:
500 × 500 pixels
and enlarge it to:
2000 × 2000 pixels
The new image has more pixels, but the original only contained 250,000 pixels.
The software has to estimate the information for the additional pixels.
Some modern image-processing tools can produce visually improved enlargements, but increasing dimensions alone cannot guarantee that all missing detail will be accurately recreated.
If you have access to the original high-resolution image, that is usually the better starting point.
What Happens When You Lower Resolution?
Lowering pixel dimensions removes pixels from an image.
For example:
4000 × 3000 → 1600 × 1200 pixels
This can be useful when:
- An image is too large for a website
- A file needs to be uploaded
- Storage space is limited
- A smaller version is needed for email
- A website needs appropriately sized images
A smaller image can also have a smaller file size, although the exact result depends on the image format and compression settings.
Always keep the original version when possible.
Image Resolution for Digital Use
For websites, mobile apps, social platforms, and other digital environments, pixel dimensions are usually more useful than a DPI number.
For example, if a website asks for:
1200 × 800 pixels
that is the requirement you need to follow.
Changing an image from 72 PPI to 300 PPI does not automatically turn a 600 × 400 image into a 1200 × 800 image.
If the required dimensions are different, you need to resize the image.
Common Digital Requirements
Depending on the platform, you may see requirements such as:
- 800 × 600 pixels
- 1080 × 1080 pixels
- 1200 × 800 pixels
- 1920 × 1080 pixels
These are pixel dimensions.
Image Resolution for Printing
Printing introduces another consideration: physical size.
A digital image does not have a physical size until you display or print it at a particular scale.
For example, an image that is:
3000 × 2000 pixels
can be printed at different physical sizes depending on the PPI.
At:
300 PPI
the theoretical size is:
10 × 6.67 inches
At:
150 PPI
the theoretical size is:
20 × 13.33 inches
The number of pixels has not changed.
The physical size associated with those pixels has changed.
Is 300 DPI Always Necessary?
You may have heard that every photograph must be 300 DPI for high-quality printing.
That is too broad as a universal rule.
The appropriate resolution can depend on:
- Printing method
- Print size
- Viewing distance
- Image content
- Printer specifications
- Production workflow
For some photographic printing situations, 300 PPI is a common target. But large-format graphics intended to be viewed from farther away may use different requirements.
If a professional printer gives you exact specifications, follow those specifications.
Simple Example: 300 PPI
Suppose you want to print an image at:
8 × 10 inches
and the workflow requires:
300 PPI
The approximate pixel dimensions needed are:
8 × 300 = 2400 pixels
10 × 300 = 3000 pixels
So you would need approximately:
2400 × 3000 pixels
for that simple calculation.
This example shows how physical dimensions, PPI, and pixels are connected.
Quick Reference: Pixels, DPI and PPI
| Concept | Simple meaning | Mainly useful for |
|---|---|---|
| Pixels | Individual units of a digital image | Digital images |
| Pixel dimensions | Width × height in pixels | Websites, screens, digital files |
| PPI | Pixels per inch | Relating digital images to physical size |
| DPI | Dots per inch | Printers and output devices |
| Physical size | Actual dimensions on paper | Printing |
Why Image Resolution Matters
Understanding resolution helps you make better decisions when working with images.
It can help you avoid:
- Blurry enlarged photos
- Unnecessarily huge files
- Incorrect print dimensions
- Wrong image sizes for websites
- Confusion about DPI and PPI
- Unnecessary resampling
- Poor-quality exports
Instead of simply choosing the biggest number, you can select settings based on the actual purpose of the image.
Beginner-Friendly Rule to Remember
If you remember only three things from this guide, remember these:
1. Pixels Tell You How Much Digital Image Information You Have
Example:
2000 × 1500 pixels
2. PPI Connects Pixels to Physical Size
Example:
300 PPI
3. DPI Refers to Physical Output Dots
Example:
Printer dot density
And remember:
Changing DPI or PPI does not automatically create missing image detail.
What Resolution Should You Use?
There is no single answer for every image.
Use the requirement as your starting point.
| Purpose | What to pay attention to |
|---|---|
| Website | Pixel dimensions |
| Social media | Pixel dimensions + aspect ratio |
| Mobile display | Pixel dimensions |
| Pixel dimensions + file size | |
| Home printing | Print size + printer requirements |
| Professional printing | Printer specifications + PPI + physical size |
| Large-format graphics | Viewing distance + production specifications |
The right resolution is the one that matches the intended use.
Final Advice for Beginners
When someone asks what is image resolution, the answer can sound complicated because the word "resolution" is used in several different ways.
The easiest way to understand it is to start with pixels.
A digital image is made from pixels. The number of pixels across and down gives you its pixel dimensions. When you connect those pixels to a physical print size, PPI becomes relevant. DPI, meanwhile, technically describes the dots produced by a printer or other output device.
Once you understand that difference, image resizing and printing become much less confusing.
You do not need to memorize every technical term immediately.
Start by asking:
How many pixels does my image have?
Then ask:
What size do I need the image to be?
And if it is being printed:
What physical size and PPI does the printing process require?
Those three questions will solve many common image-resolution problems.
What Is Image Resolution? Advanced Explanation, Examples, Comparisons & Best Practices
How Image Resolution Works in Real-World Situations
Now that the basic terms are clear, it becomes easier to understand how resolution works when you actually use an image.
The same photograph can be used:
- On a website
- As a social media post
- In an email
- In a presentation
- On a printed flyer
- In a photo book
- On a large poster
The image does not necessarily need the same settings for every purpose.
The important thing is to prepare the image according to its final use.
Pixel Dimensions vs Physical Dimensions
This is one of the most important concepts to understand.
Pixel Dimensions
Pixel dimensions describe the digital image.
For example:
2400 × 1600 pixels
This tells you how many pixels are arranged horizontally and vertically.
Physical Dimensions
Physical dimensions describe the size of a printed image.
For example:
8 × 10 inches
The connection between these two depends on PPI.
Basic Formula
Physical size = Pixels ÷ PPI
And:
Required pixels = Physical size × PPI
These formulas are useful when preparing images for print.
Example: A 3000 × 2000 Pixel Image
Suppose you have an image that measures:
3000 × 2000 pixels
At 300 PPI:
- 3000 ÷ 300 = 10 inches
- 2000 ÷ 300 ≈ 6.67 inches
So the theoretical print size is:
10 × 6.67 inches
At 200 PPI:
- 3000 ÷ 200 = 15 inches
- 2000 ÷ 200 = 10 inches
The same pixel dimensions can therefore correspond to different physical sizes.
This is why simply looking at the PPI number does not tell you how many pixels the image contains.
What Happens When You Change PPI?
There are two different situations.
Changing PPI Without Resampling
The pixel dimensions stay the same.
For example:
3000 × 2000 pixels at 72 PPI
becomes:
3000 × 2000 pixels at 300 PPI
The number of pixels has not changed.
The theoretical physical size has changed.
Changing PPI With Resampling
If resampling is enabled, the software may change the pixel dimensions as well.
For example:
3000 × 2000 pixels
could become:
6000 × 4000 pixels
depending on the settings.
This is no longer just a metadata change.
The image has been resampled.
Always check the resampling option before applying a resolution change.
What Is Image Resampling?
Image resampling is the process of changing the number of pixels in an image.
It can happen in two directions.
Upsampling
The image becomes larger in pixel dimensions.
Example:
1000 × 1000 → 2000 × 2000 pixels
The software generates additional pixels.
Downsampling
The image becomes smaller.
Example:
4000 × 4000 → 2000 × 2000 pixels
The software removes or combines pixel information.
Comparison
| Process | Pixel dimensions | Main effect |
|---|---|---|
| Upsampling | Increase | Creates additional estimated pixels |
| Downsampling | Decrease | Removes/reduces pixel information |
| PPI change without resampling | Stay the same | Changes physical-size interpretation |
| Cropping | Usually decreases | Removes part of the image |
Does Upscaling Create Real Detail?
Not necessarily.
Suppose the original image is:
500 × 500 pixels
and you upscale it to:
2000 × 2000 pixels
The new file contains four times the width and height in pixels, but the original photograph did not contain that additional captured information.
The software estimates what the new pixels should look like.
Depending on the image and technology used, the result may be acceptable, but it is not the same as having originally captured a 2000 × 2000 image with comparable quality.
This distinction is important when preparing photographs for professional use.
When Should You Upscale an Image?
Upscaling can make sense when:
- The final display requires larger dimensions
- The original is reasonably sharp
- A larger version is needed for a design
- The output size is only moderately larger
- A suitable image-enhancement tool is available
But avoid assuming that extreme enlargement will always produce a professional result.
If a high-resolution original exists, use it instead.
When Should You Downscale an Image?
Downscaling is useful when the original is much larger than necessary.
For example:
6000 × 4000 pixels
may be unnecessary for a small website thumbnail.
You could create a smaller version such as:
1200 × 800 pixels
while keeping the original safely stored.
Benefits can include:
- Smaller files
- Easier uploads
- Faster image handling
- Less unnecessary image data
- Better control over website image dimensions
The exact benefit depends on the file format and how the image is used.
Resolution for Websites
For websites, pixel dimensions are usually the most practical resolution measurement.
Suppose a website's content area displays an image at approximately 800 pixels wide.
Uploading a 6000-pixel-wide image may be unnecessary if the site does not need that additional resolution.
A properly sized image can be more practical.
Website Image Checklist
Before uploading, consider:
- Display width
- Display height
- Retina/high-density displays where relevant
- File size
- Image format
- Compression
- Responsive layouts
Do not reduce an image blindly.
The goal is to provide enough image information for the intended display while avoiding unnecessary file size.
Resolution for Social Media
Social platforms often provide image specifications in pixels.
For example, a platform may request a particular width and height.
In that situation, pay attention to:
Pixel dimensions + aspect ratio
rather than simply changing the DPI number.
For example:
1080 × 1080 pixels
is a square image.
The aspect ratio is:
1:1
A different image shape may require cropping before resizing.
Resolution for Email Images
Email images often need to balance visual quality with file size.
An extremely large image may be unnecessary if it will only be displayed in a relatively small area.
For example, a photograph that is:
5000 × 3333 pixels
may be excessive for a small email banner.
A smaller version can often be created for the email while keeping the original file separately.
The correct size depends on the email layout and how the image will be displayed.
Resolution for Documents and Presentations
Images placed in documents and presentations can also have different requirements.
A presentation displayed on a screen does not necessarily need the same preparation as a photograph being professionally printed.
Consider:
- Presentation dimensions
- Image display size
- Screen resolution
- Document export settings
- Whether the document will be printed
If the document will eventually be printed, print requirements should be considered during preparation.
Resolution for Printing
Printing requires a little more planning.
You need to consider:
- Physical print size
- Available pixel dimensions
- PPI
- Printer requirements
- Viewing distance
- Image content
For example, a small photograph viewed closely may need a different preparation approach from a large banner viewed from several metres away.
There is no universal resolution number that applies perfectly to every printing situation.
Common Print Calculation
Suppose you need a:
5 × 7 inch print
and the workflow uses:
300 PPI
Calculate:
5 × 300 = 1500 pixels
7 × 300 = 2100 pixels
So approximately:
1500 × 2100 pixels
would correspond to that physical size at 300 PPI.
This is a simple calculation, but it illustrates the relationship between physical size and pixels.
What If the Image Does Not Have Enough Pixels?
Suppose you need:
3000 × 2000 pixels
but your original image is:
1500 × 1000 pixels
You have several options.
Option 1: Use the Original at a Smaller Physical Size
This preserves the existing image information.
Option 2: Upscale
You can increase the pixel dimensions using an image-resizing or enhancement tool.
The result may be acceptable depending on the original.
Option 3: Find a Higher-Resolution Original
This is usually the preferred option when available.
Option 4: Change the Final Output Size
If possible, reduce the physical or digital dimensions required.
The best option depends on the project.
Common Mistakes Beginners Make
Mistake 1: Thinking DPI Is the Same as Image Size
A DPI value does not tell you how many pixels are in the image.
A 3000 × 2000 image and a 1000 × 667 image could both have the same PPI setting.
The pixel dimensions are different.
Better Approach
Always check the actual pixel width and height.
Mistake 2: Believing 300 DPI Automatically Means High Quality
A high DPI/PPI setting does not compensate for:
- Low pixel dimensions
- Blur
- Heavy compression
- Poor focus
- Missing image detail
Better Approach
Look at the source image and its pixel dimensions.
Mistake 3: Increasing Every Number
Some beginners increase:
- Width
- Height
- DPI
- PPI
all at once because they assume bigger values mean better quality.
This can produce a file that is unnecessarily large without solving the actual problem.
Better Approach
Change only the setting required by the destination.
Mistake 4: Ignoring Aspect Ratio
Suppose the original image is:
4000 × 3000
and you force it into:
1000 × 1000
without cropping or preserving proportions.
The image may become distorted.
Better Approach
Use a square crop or preserve the aspect ratio before resizing.
Mistake 5: Editing the Original File
If you repeatedly resize and compress your only original file, you may make it harder to create a high-quality version later.
Better Approach
Keep the original untouched.
Create separate versions for:
- Website
- Social media
- Documents
Mistake 6: Using Screenshots Instead of Originals
A screenshot may have fewer pixels than the original photograph.
If you have access to the original image, use it.
Better Approach
Always start with the best available source.
Mistake 7: Assuming File Size Equals Resolution
A large file does not automatically mean high image resolution.
A file can be large because of:
- Low compression
- Metadata
- Large pixel dimensions
- PNG format
- Other file characteristics
Likewise, a smaller file can still look excellent for its intended use.
Better Approach
Check the actual pixel dimensions and image quality.
Mistake 8: Ignoring the Printer's Requirements
A generic internet recommendation may not match your printer's workflow.
Better Approach
If a professional printing service gives you specifications, follow them.
Practical Examples
Example 1: Website Upload
You have:
4000 × 3000 pixels
The website requires:
1200 × 900 pixels
What should you do?
Resize the image to:
1200 × 900 pixels
If the aspect ratio matches, no cropping may be necessary.
Changing the image to 300 DPI is not the main requirement.
Example 2: Square Social Image
Original:
3000 × 2000 pixels
Required:
1080 × 1080 pixels
The original has a 3:2 aspect ratio.
The target is 1:1.
Recommended workflow
- Crop the image to a square.
- Position the important subject correctly.
- Resize to 1080 × 1080 pixels.
- Export the final version.
Simply stretching the image would distort it.
Example 3: Print Photograph
Original:
2400 × 3000 pixels
Required print:
8 × 10 inches
At:
300 PPI
Required pixels:
8 × 300 = 2400
10 × 300 = 3000
The image matches the basic requirement.
No additional pixel creation is needed for this simple example.
Example 4: Small Image for a Large Print
Original:
1000 × 750 pixels
Desired physical print:
10 × 7.5 inches
At 300 PPI, you would ideally need:
3000 × 2250 pixels
The original has substantially fewer pixels.
Upscaling is possible, but the result may not contain the same level of detail as a photograph originally captured at 3000 × 2250 pixels.
Pros and Cons of High-Resolution Images
Pros
- More flexibility when cropping
- More flexibility for larger output
- Can preserve more image information
- Useful for detailed print work
- Better starting point for creating smaller versions
Cons
- Larger files
- More storage required
- Longer upload times in some situations
- May be unnecessary for small digital displays
- Can require additional processing
High resolution is useful when you need it.
It is not automatically better for every situation.
Pros and Cons of Low-Resolution Images
Pros
- Smaller files
- Easier to share
- Faster to upload
- Useful for small displays
- Can be suitable for thumbnails and previews
Cons
- Less flexibility for cropping
- Limited ability to enlarge
- Can become pixelated when enlarged
- Less suitable for larger prints
The goal is not to make every image as large as possible.
The goal is to use an appropriate image for the intended purpose.
Best Practices for Managing Image Resolution
1. Keep a High-Quality Original
Store the original separately.
This gives you a source for creating future versions.
2. Create Different Versions for Different Uses
You may need separate versions for:
- Website
- Social media
- Presentation
Do not force one file to work perfectly for every situation.
3. Check Pixel Dimensions First
Before changing DPI or PPI, check the image's actual width and height in pixels.
4. Understand the Destination
Ask what the image is being used for.
Digital and print workflows have different considerations.
5. Preserve Aspect Ratio
Avoid stretching an image simply to achieve specific dimensions.
6. Avoid Excessive Upscaling
Use a better original whenever possible.
7. Follow Printer Specifications
If the printer provides requirements, use them instead of relying on a generic recommendation.
8. Export Carefully
Choose an appropriate format and quality level.
9. Review the Final Image
Check the image at the size where it will actually be viewed.
10. Keep the Workflow Simple
Do not change settings that are not required.
Quick Decision Table
| If you need to... | Focus on... |
|---|---|
| Make a website image smaller | Pixel dimensions |
| Create a square image | Aspect ratio + pixels |
| Print a photograph | Physical size + PPI + pixels |
| Increase digital image dimensions | Resampling/upscaling |
| Reduce image dimensions | Downsampling |
| Change print metadata | PPI without resampling, when appropriate |
| Fix a blurry image | Source quality/enhancement |
| Reduce file size | Dimensions + compression |
| Preserve the whole image | Canvas expansion instead of cropping |
A Simple Resolution Workflow
When you are unsure what to do with an image, follow this process:
Step 1: Check the Original
Find the highest-quality version available.
Step 2: Check the Pixel Dimensions
For example:
4000 × 3000 pixels
Step 3: Identify the Destination
Is it for:
- Website?
- Social media?
- Email?
- Document?
- Print?
Step 4: Check the Requirement
Find out whether the destination specifies:
- Pixel dimensions
- Aspect ratio
- PPI
- DPI
- Physical dimensions
- File size
Step 5: Make the Necessary Change
Do not change everything.
Step 6: Preserve the Aspect Ratio
Unless cropping or distortion is intentional.
Step 7: Export a New Version
Keep the original untouched.
Step 8: Review
Check the final image before publishing, uploading, or printing.
A Useful Mental Model
Think about image resolution this way:
Pixels = building blocks
Pixel dimensions = how many blocks you have
PPI = how densely those blocks are assigned to physical space
DPI = physical output dots from a printer/device
This simple model makes many image-resolution questions easier to understand.
Final Advice for Part 2
You do not need to become a professional designer to understand image resolution.
The key is knowing what each measurement controls.
If you are working digitally, start with pixels.
If you are preparing something for physical printing, consider pixels, PPI, physical dimensions, and the printer's specifications.
If you are increasing the number of pixels, understand that you are resampling the image. More pixels in the final file do not necessarily mean that the original image contains more real detail.
And if you are changing only the PPI value without resampling, remember that you are changing the relationship between the existing pixels and the physical output—not creating new photographic information.
Once these concepts are clear, terms like "high resolution," "300 DPI," and "large image" become much easier to evaluate. - youtube-thumbnail-enhancer
Ready to optimize your images?
Every tool mentioned in this article is free to use. No upload, no signup, and no watermarks — ever.
Try our free toolsRelated articles
How to Change Image Resolution Online: DPI, PPI & Pixels Explained
Learn how to change image resolution online and understand DPI, PPI, and pixels. Discover the difference between digital image size and print resolution.
How to Make an Image Clearer Online: Easy Quality Tips
Learn how to make an image clearer online by improving sharpness, reducing blur, adjusting lighting, and increasing resolution with practical methods.
How to Crop a Photo to Any Size Without Losing Quality
Learn how to crop a photo to any size without losing quality. Discover the right dimensions, aspect ratios, resolution tips, and simple cropping techniques.