
How to Make a Small Image Bigger Without Losing Quality
Learn how to make a small image bigger without losing quality using proper resizing, image upscaling, sharpening, cropping, and export techniques.
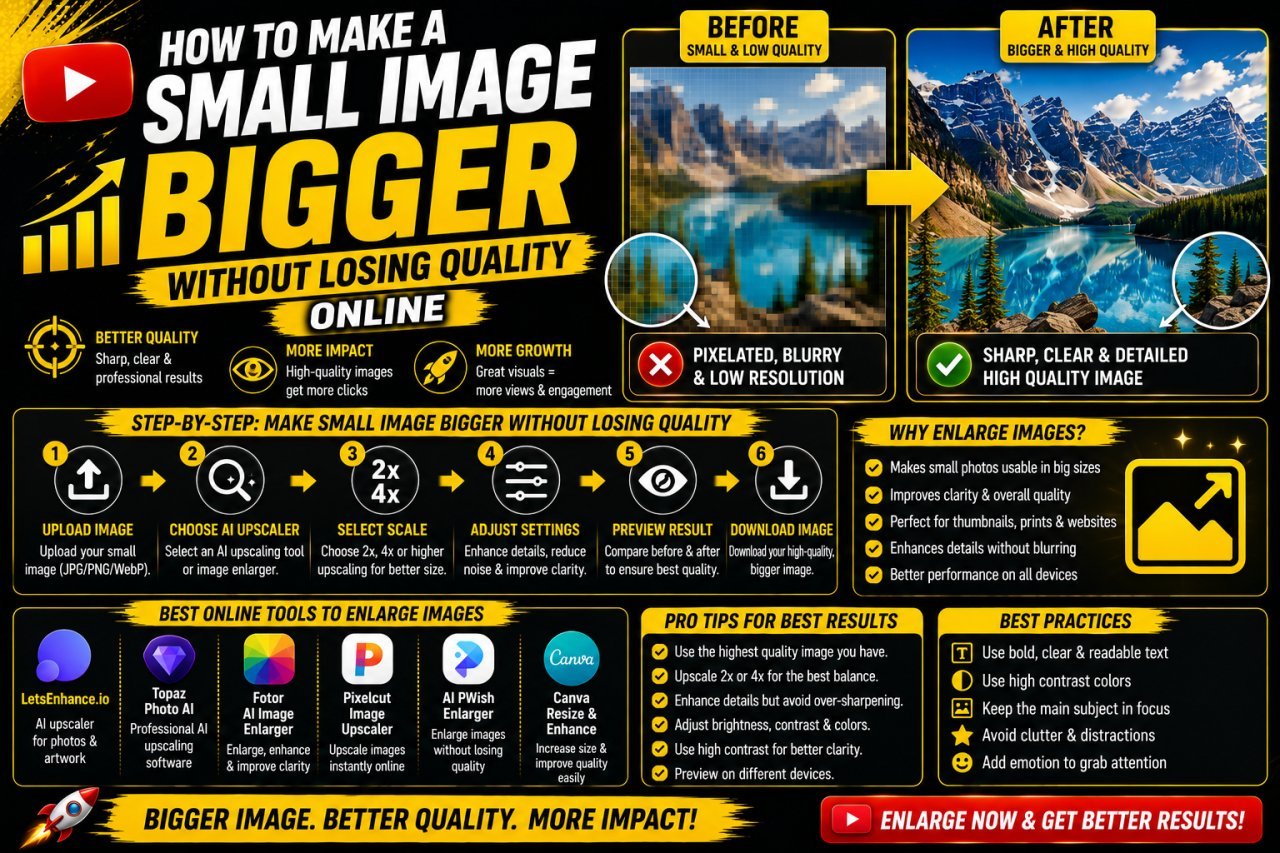
How to Make a Small Image Bigger Without Losing Quality
Making a small image bigger sounds simple, but getting a clean result can be surprisingly difficult. If you enlarge a low-resolution photo too much, it can become blurry, pixelated, or soft.
If you're searching for how to make a small image bigger without losing quality, the key is to understand the difference between simply increasing the image dimensions and actually improving its appearance.
A basic resize can make a file larger, but it cannot magically create details that were never captured in the original image. More advanced image upscaling and enhancement techniques can estimate additional detail and produce a cleaner result, especially when the original image is reasonably clear.
In this guide, you'll learn how to enlarge a small image properly, which methods work best, what mistakes to avoid, and how to choose the right output size for websites, social media, YouTube thumbnails, printing, and other uses.
Why This Topic Matters
Small images are everywhere.
You may have a useful photograph that is too small for a website banner, a product image that looks blurry when enlarged, an old family photo that needs restoration, or a small graphic that needs to be used in a larger design.
Simply stretching the image often creates poor results.
A small image may contain fewer pixels than your final design requires. When those pixels are enlarged, the software has to estimate what the additional pixels should look like.
That's why the goal shouldn't simply be:
"Make the image larger."
A better goal is:
"Make the image larger while keeping it as clear and natural-looking as possible."
This distinction can make a major difference in the final result.
What Happens When You Make a Small Image Bigger?
A digital image is made up of pixels. Each pixel contains information about color and brightness.
Suppose you have an image that is:
500 × 500 pixels
and you increase it to:
2000 × 2000 pixels
The new image contains many more pixels, but the original image did not suddenly capture additional real-world detail.
The resizing process has to calculate the appearance of the newly created pixels.
This is called interpolation.
Depending on the method used, the result can be:
- Smooth but slightly soft
- Sharper-looking
- Pixelated
- Artificial
- More detailed-looking
- Less detailed-looking
The quality of the original image and the enlargement method both matter.
Resolution vs. Image Quality
These terms are often confused.
Resolution refers to the number of pixels in an image.
Image quality is broader. It can include:
- Sharpness
- Detail
- Focus
- Noise
- Compression
- Color accuracy
- Texture
- Exposure
- Overall visual clarity
An image can have large dimensions but still look poor.
For example, enlarging a heavily pixelated 300 × 300 image to 3000 × 3000 pixels doesn't automatically make it equivalent to an original 3000 × 3000 photograph.
That's why increasing dimensions and improving quality should be treated as related but separate tasks.
How Big Should You Make a Small Image?
There is no single enlargement size that works for every image.
The correct output depends on how much larger the image needs to be and where you plan to use it.
For example:
| Original Image | Possible Output | Typical Use |
|---|---|---|
| 400 × 400 | 800 × 800 | Small web graphics |
| 640 × 480 | 1280 × 960 | Larger digital use |
| 800 × 600 | 1600 × 1200 | Website or presentation |
| 1000 × 1000 | 2000 × 2000 | Social or digital graphics |
| 1280 × 720 | 1920 × 1080 | HD video-related graphics |
These are examples rather than universal requirements.
The best output size depends on the original image, its visual quality, the viewing distance, and the final platform.
The Best Way to Make a Small Image Bigger
For many images, a careful enlargement workflow works better than simply dragging the image to a larger size.
A practical process is:
Find the best original → Check dimensions → Upscale → Enhance → Sharpen carefully → Crop if needed → Export
Let's look at each step.
Step 1: Find the Highest-Quality Original
Before using an image upscaler, look for a better source.
You might have:
- The original camera photo
- A larger version on your computer
- A cloud backup
- An original design file
- A high-resolution download
- A larger copy from the photographer
If you have access to a larger original, use it instead of enlarging a tiny copy.
This is one of the simplest ways to preserve quality.
Step 2: Check the Current Dimensions
Find out the image's width and height before editing.
For example:
600 × 400 pixels
tells you that the image is relatively small.
Knowing the starting dimensions helps you decide whether you need a modest enlargement or a much larger upscale.
Step 3: Decide the Final Size
Don't choose the largest possible output automatically.
Instead, ask:
Where will this image be used?
A small website image may require much less enlargement than a large presentation graphic.
Choosing the final size first helps prevent unnecessary processing.
The Best Way to Make a Small Image Bigger
For many images, a careful enlargement workflow works better than simply dragging the image to a larger size.
A practical process is:
Find the best original → Check dimensions → Upscale → Enhance → Sharpen carefully → Crop if needed → Export
Let's look at each step.
Step 1: Find the Highest-Quality Original
Before using an image upscaler, look for a better source.
You might have:
- The original camera photo
- A larger version on your computer
- A cloud backup
- An original design file
- A high-resolution download
- A larger copy from the photographer
If you have access to a larger original, use it instead of enlarging a tiny copy.
This is one of the simplest ways to preserve quality.
Step 2: Check the Current Dimensions
Find out the image's width and height before editing.
For example:
600 × 400 pixels
tells you that the image is relatively small.
Knowing the starting dimensions helps you decide whether you need a modest enlargement or a much larger upscale.
Step 3: Decide the Final Size
Don't choose the largest possible output automatically.
Instead, ask:
Where will this image be used?
A small website image may require much less enlargement than a large presentation graphic.
Choosing the final size first helps prevent unnecessary processing.
Use an Image Upscaler for Better Results
An image upscaler is designed to increase the dimensions of an image while attempting to preserve or improve its visual appearance.
Basic resizing methods mainly calculate new pixels from existing ones.
More advanced upscaling systems may analyze patterns, edges, textures, and other visual information to produce a more convincing enlargement.
This can be especially useful when:
- The original image is reasonably sharp.
- The image is only moderately small.
- The subject has recognizable shapes.
- The image needs a larger digital output.
- You need to enlarge a photo without manually rebuilding it.
However, an upscaler is not magic.
If an image is extremely tiny, severely blurred, or heavily compressed, the result may still have visible limitations.
Use an Image Upscaler for Better Results
An image upscaler is designed to increase the dimensions of an image while attempting to preserve or improve its visual appearance.
Basic resizing methods mainly calculate new pixels from existing ones.
More advanced upscaling systems may analyze patterns, edges, textures, and other visual information to produce a more convincing enlargement.
This can be especially useful when:
- The original image is reasonably sharp.
- The image is only moderately small.
- The subject has recognizable shapes.
- The image needs a larger digital output.
- You need to enlarge a photo without manually rebuilding it.
However, an upscaler is not magic.
If an image is extremely tiny, severely blurred, or heavily compressed, the result may still have visible limitations.
Basic Resizing vs. Image Upscaling
| Feature | Basic Resizing | Image Upscaling |
|---|---|---|
| Increases dimensions | Yes | Yes |
| Easy to use | Yes | Usually |
| Adds estimated pixels | Yes | Yes |
| Attempts detail enhancement | Limited | Often |
| Good for small size changes | Yes | Yes |
| Useful for very low-resolution images | Limited | Potentially better |
| Can create artificial details | Less likely | Possible with advanced methods |
| Requires careful checking | Recommended | Very important |
For a simple size adjustment, normal resizing may be enough.
For a small image that needs a significant enlargement, a dedicated upscaling tool may provide a better-looking result.
Keep the Original Aspect Ratio
One of the easiest ways to damage an image is to stretch it.
Suppose your original photo is:
1200 × 800 pixels
Its aspect ratio is 3:2.
If you force it into:
1200 × 1200 pixels
without cropping or adding space, the image will be distorted.
People may look wider.
Objects may look stretched.
Circles may become ovals.
Buildings may appear unnaturally narrow or wide.
Instead, keep the aspect ratio locked during resizing.
If you need a different shape, use one of these approaches:
- Crop the image.
- Add background space.
- Place the image inside a larger canvas.
- Reframe the composition.
Avoid stretching the original subject simply to fill a required size.
Why Cropping Can Be Better Than Extreme Enlargement
Sometimes the problem isn't that the image is too small.
The problem is that you are trying to make too much of the image fill a large space.
For example, imagine a small photo of a person standing in a large landscape.
If you enlarge the entire image to fill a banner, the person's face may remain too small.
A better approach can be to crop around the important subject first and then upscale the remaining area.
This can make the main subject more prominent without requiring unnecessary enlargement of the entire original image.
A Simple Example
Instead of:
Small full image → huge enlargement
try:
Small full image → crop important subject → moderate enlargement
This works particularly well for:
- Portraits
- Product photos
- YouTube thumbnails
- Social media graphics
- Website banners
- Promotional images
Be Careful With Sharpening
After enlarging a small image, it may look slightly soft.
A small amount of sharpening can improve the perceived definition of edges.
Sharpening can be useful for:
- Product edges
- Hair
- Clothing
- Buildings
- Objects
- Simple graphics
But sharpening should not be treated as a replacement for resolution.
Too much sharpening can create:
- Bright halos
- Dark outlines
- Jagged edges
- Increased noise
- Harsh skin texture
- Artificial-looking details
A good rule is to apply sharpening gradually and stop when the image looks clearer without becoming unnatural.
Can You Really Make a Small Image Bigger Without Losing Quality?
The honest answer is: not always perfectly.
If by "without losing quality" you mean making a tiny image look exactly like an original high-resolution photograph, that isn't guaranteed.
When the source contains limited information, enlargement cannot recover every detail that was never captured.
However, you can often make a small image larger and more usable while minimizing visible quality loss.
Results are generally more promising when:
- The original image is reasonably sharp.
- The enlargement is moderate.
- The image isn't heavily compressed.
- The subject has clear edges.
- The original isn't severely blurry.
- You use a suitable upscaling method.
- You avoid excessive sharpening.
The goal is not to create impossible detail.
The goal is to produce the cleanest, most natural result possible from the source you have.
Beginner-Friendly Workflow
If you're new to image editing, use this simple process.
1. Save the original image
Keep an untouched backup.
2. Check its dimensions
Know the starting width and height.
3. Choose the required output size
Don't enlarge it more than necessary.
4. Keep the aspect ratio locked
Prevent unwanted stretching.
5. Upscale the image
Use an appropriate online image upscaling tool.
6. Inspect the result
Look closely at faces, text, edges, and textures.
7. Apply light sharpening if needed
Don't overdo it.
8. Export the final image
Use suitable quality settings for the intended use.
9. Compare it with the original
Make sure the enhanced version actually looks better.
This workflow is simple enough for beginners while still avoiding the most common quality problems.
What You Should Not Expect From Image Enlargement
It's useful to have realistic expectations.
Making a small image bigger does not guarantee that you can:
- Recover completely missing facial details.
- Reconstruct unreadable text perfectly.
- Remove severe motion blur.
- Restore every detail from heavy compression.
- Turn a tiny screenshot into an original-quality photograph.
- Make every low-resolution image look like a professional camera photo.
Image enhancement can improve appearance, but it has limits.
If the original source is extremely poor, finding a better version is often more effective than applying stronger and stronger filters.
Quick Tips Before You Enlarge an Image
Before you start, remember these simple tips:
- Use the original file whenever possible.
- Don't enlarge more than necessary.
- Keep the aspect ratio locked.
- Use an upscaler for significant enlargement.
- Inspect faces and text carefully.
- Apply sharpening lightly.
- Avoid repeated compression.
- Keep an untouched backup.
- Compare the final version with the original.
- Choose output dimensions based on the final use.
These small decisions can make a noticeable difference in the final image.
Advanced Method: How to Enlarge a Small Image Properly
If a small image needs a significant size increase, the order of your edits matters.
A practical workflow is:
- Start with the highest-quality original.
- Check the image dimensions.
- Decide the final output size.
- Crop only if necessary.
- Upscale the image.
- Reduce visible noise or compression artifacts.
- Adjust brightness and contrast.
- Apply moderate sharpening.
- Inspect important details.
- Export the final version.
Doing everything with maximum settings can make the image look artificial.
The goal is controlled improvement, not simply creating the largest possible file.
How Much Should You Upscale a Small Image?
There is no universal enlargement percentage that works for every image.
A 2× enlargement means that the width and height are each doubled. Because both dimensions increase, the total pixel count becomes four times larger.
For example:
| Original | 2× Dimensions | Approx. Pixel Count Increase |
|---|---|---|
| 500 × 500 | 1000 × 1000 | 4× |
| 640 × 480 | 1280 × 960 | 4× |
| 800 × 600 | 1600 × 1200 | 4× |
| 1000 × 750 | 2000 × 1500 | 4× |
A moderate enlargement is often easier to make look natural than an extreme enlargement.
If you need a much larger output, inspect the result carefully instead of assuming that a bigger number means better quality.
Basic Resizing vs. AI Upscaling
Basic resizing and AI-assisted upscaling have different purposes.
| Method | Best For | Advantages | Limitations |
|---|---|---|---|
| Basic resizing | Small size changes | Simple and fast | Limited detail improvement |
| High-quality interpolation | General enlargement | Smooth results | Cannot recreate missing detail |
| AI upscaling | Larger enlargement | May improve perceived detail | Can produce artificial details |
| Manual editing | Graphics and text | Maximum design control | Takes more time |
| Recreating elements | Logos and text | Very clean result | Requires manual work |
For a simple image size adjustment, normal resizing may be sufficient.
When a small image needs a substantial enlargement, an upscaling tool may produce a more useful result.
For text, logos, and important graphic elements, recreating them as new elements can often be better than enlarging a blurry raster copy.
How to Make a Small Photo Bigger Without Making It Blurry
If your main concern is blur, avoid trying to solve everything with sharpening.
A better process is:
Step 1: Start With the Best Source
Find the largest original version available.
Step 2: Avoid Unnecessary Cropping
Every crop removes part of the available image area.
If you need a close-up, make sure the remaining subject has enough resolution for the final output.
Step 3: Upscale Carefully
Use a suitable enlargement method rather than simply stretching the image.
Step 4: Check the Result
Look at important areas such as:
- Eyes
- Hair
- Clothing
- Product edges
- Fine patterns
- Text
Step 5: Sharpen Moderately
If the image looks soft after enlargement, apply a small amount of sharpening.
The objective is to make edges clearer without creating artificial outlines.
How to Enlarge a Small Image for a Website
Website images need to look clear while remaining practical for web use.
If a small image is going into a website design, first determine the size at which it will actually appear.
For example, if the image will be displayed at around 800 pixels wide, creating an unnecessarily enormous file may not provide a practical benefit.
A useful workflow is:
Original image → Upscale if required → Crop → Optimize → Upload
Before publishing, check:
- Image dimensions
- File size
- Sharpness
- Mobile appearance
- Desktop appearance
- Text readability
- Overall visual quality
Don't confuse a larger file with a better website image.
The image should be large enough for its intended display while remaining appropriately optimized.
How to Enlarge a Small Image for YouTube
If you're enlarging a small image to use in a YouTube thumbnail, the image needs to work as part of the entire thumbnail design.
YouTube's official documentation recommends a 16:9 aspect ratio for standard video thumbnails and lists 3840 × 2160 pixels as the recommended high-resolution size. It also specifies a minimum width of 640 pixels. :contentReference[oaicite:0]{index=0}
If your source image is small, don't simply stretch it across the entire canvas.
Instead:
- Place the image on a 16:9 canvas.
- Crop strategically if necessary.
- Upscale the important subject.
- Keep the subject's proportions natural.
- Add text separately.
- Use a clean background where appropriate.
- Check the thumbnail at a small display size.
For YouTube thumbnails, the overall composition matters just as much as the resolution of the individual photograph.
How to Enlarge a Small Image for Printing
Printing requires more planning than simply increasing the pixel dimensions.
Before enlarging an image for print, determine:
- Final physical print size
- Image dimensions
- Required print resolution
- Type of printer
- Viewing distance
- Whether the image contains photographs or text
A small photograph that looks acceptable on a phone may not look equally good when printed much larger.
If the image is important, start with the highest-resolution original available.
If you only have a small file, moderate upscaling may help, but don't expect it to produce the same result as an original high-resolution photograph.
When possible, ask the printing service for its preferred file specifications before preparing the final image.
How to Enlarge a Small Logo Without Losing Quality
Logos are different from ordinary photographs because they often contain clean lines, simple shapes, and text.
If you only have a small raster version of a logo, enlarging it can make the edges look rough.
The best solution may be to obtain the original:
- SVG
- AI
- EPS
- High-resolution PNG
Vector versions are particularly useful for logos because they can generally be scaled to different dimensions without the same pixel-based limitations as raster images.
If a vector version isn't available, recreate the logo carefully rather than repeatedly enlarging a tiny copy.
This is especially important for:
- Business logos
- Brand names
- Product packaging
- Website headers
- Marketing materials
How to Improve a Small Image Before Upscaling
Sometimes the source image has problems that should be addressed before enlargement.
For example, a photo may be:
- Too dark
- Noisy
- Slightly blurry
- Low contrast
- Heavily compressed
However, don't automatically apply every available filter.
First identify the biggest problem.
If the Image Is Noisy
Use moderate noise reduction.
If the Image Is Too Dark
Adjust exposure or brightness carefully.
If the Image Is Flat
A small contrast adjustment may help.
If the Image Is Slightly Soft
Use appropriate sharpening.
If the Image Is Extremely Small
Focus on getting the best possible source before attempting aggressive enhancement.
The fewer unnecessary edits you make, the easier it is to keep the final result natural.
Pros and Cons of Enlarging Small Images Online
Pros
- Convenient and browser-based
- No complicated software installation
- Fast for simple tasks
- Useful for moderate enlargement
- Can combine resizing and enhancement
- Helpful when a larger original is unavailable
Cons
- Missing detail cannot always be recovered
- Extreme enlargement may look artificial
- AI tools can sometimes invent visual details
- Some online services have upload restrictions
- Export settings can affect the final quality
- Privacy should be considered for personal images
- Results vary depending on the original image
Online enhancement is useful, but it should be viewed as a way to improve an available source—not as a guaranteed way to turn every tiny image into a perfect high-resolution image.
Conclusion
Learning how to make a small image bigger without losing quality is less about making the image as large as possible and more about using the right enlargement process.
Start with the highest-quality original available. Check its dimensions, decide the final size, keep the aspect ratio locked, and use an appropriate resizing or upscaling method.
If the image needs only a small size increase, basic resizing may be enough. For a more significant enlargement, an image upscaler can produce a better-looking result. After enlarging, inspect important details and use sharpening carefully if the image looks soft.
It's also important to understand the limits of image enlargement. A small image cannot always be transformed into the same quality as an original high-resolution photograph. Missing information cannot always be recovered perfectly.
For the best results, follow this simple workflow:
Best original → Correct crop → Upscale → Enhance → Light sharpening → Review → Export
If the result still looks poor, don't keep increasing the enhancement strength. Look for a larger original, recreate important text or logos, or choose a different image.
The goal is to create a larger image that looks clear, natural, and suitable for its intended use.
Call To Action
Have a small image that needs to be larger for your website, social media post, YouTube thumbnail, presentation, or another project?
Use an online image resizing and enhancement workflow to enlarge your image while keeping the result as clean and natural as possible.
Upload your best original, choose the required dimensions, upscale carefully, and review the final result before downloading.
Ready to make your small image bigger? Start with your original image and create a cleaner, larger version online.
1. How can I make a small image bigger without losing quality?
Use the highest-resolution original available and enlarge it with a suitable image resizing or upscaling tool. Maintain the aspect ratio, avoid unnecessary enlargement, and use moderate sharpening after resizing if the image looks soft.
2. Can I enlarge an image without making it blurry?
You can often enlarge an image while minimizing visible blur, but perfect results are not guaranteed. The original resolution, image quality, enlargement amount, and resizing method all affect the final result.
3. What is the best way to increase image size?
For a small size adjustment, high-quality resizing may be enough. For a larger enlargement, an image upscaling tool can be useful. Start with the best original file and choose an output size based on the final use.
4. Does increasing image resolution improve quality?
Increasing the resolution increases the number of pixels, but it does not automatically restore missing image detail. Upscaling and enhancement can improve the visual appearance of some images, but results depend on the original source.
5. Can I make a 500 × 500 image 2000 × 2000?
Yes. You can resize or upscale a 500 × 500 image to 2000 × 2000 pixels. However, the larger dimensions do not mean that the image will contain the same detail as an image originally captured at 2000 × 2000 pixels.
6. Does AI upscaling make small images clearer?
AI upscaling can improve the perceived detail and appearance of some small images. However, it may also create artificial-looking details, particularly in faces, text, logos, and complex patterns. Always inspect the result before using it.
7. How do I enlarge a photo without stretching it?
Lock the aspect ratio while resizing. If you need a different shape, crop the image or place it on a larger canvas rather than changing the width and height independently.
8. Can sharpening make an enlarged image look better?
Yes. Moderate sharpening can make edges appear more defined after enlargement. However, sharpening cannot recreate missing information, and excessive sharpening can create halos, noise, and unnatural edges.
9. How can I enlarge a small image for a YouTube thumbnail?
Create the thumbnail using the appropriate aspect ratio, then place and upscale the important image content without stretching it. YouTube currently recommends a 16:9 thumbnail and lists 3840 × 2160 pixels as its recommended high-resolution size. :contentReference[oaicite:0]{index=0}
10. What should I do if my image becomes pixelated after enlargement?
Try returning to the original file, reducing the enlargement amount, or using a suitable image upscaling method. If the original is extremely small or heavily compressed, look for a higher-resolution version instead of applying increasingly strong filters.
Ready to optimize your images?
Every tool mentioned in this article is free to use. No upload, no signup, and no watermarks — ever.
Try our free toolsRelated articles
How to Make a Low-Quality Image HD Online
Learn how to make a low-quality image HD online using image upscaling, sharpening, resizing, noise reduction, and practical quality improvement techniques.
How to Increase Image Size Without Losing Quality
Want to make a small image larger without making it blurry? Learn practical ways to increase image size, improve resolution, reduce pixelation, and keep photos, graphics, and text as clear as possible.
How to Change Image Resolution Online: DPI, PPI & Pixels Explained
Learn how to change image resolution online and understand DPI, PPI, and pixels. Discover the difference between digital image size and print resolution.