
How to Prepare Images for Online Forms: Complete Guide
Need to upload a photo to an online form? Learn how to prepare images with the correct pixels, dimensions, file format, KB or MB limit, aspect ratio, and image quality so your file uploads successfully without becoming blurry.
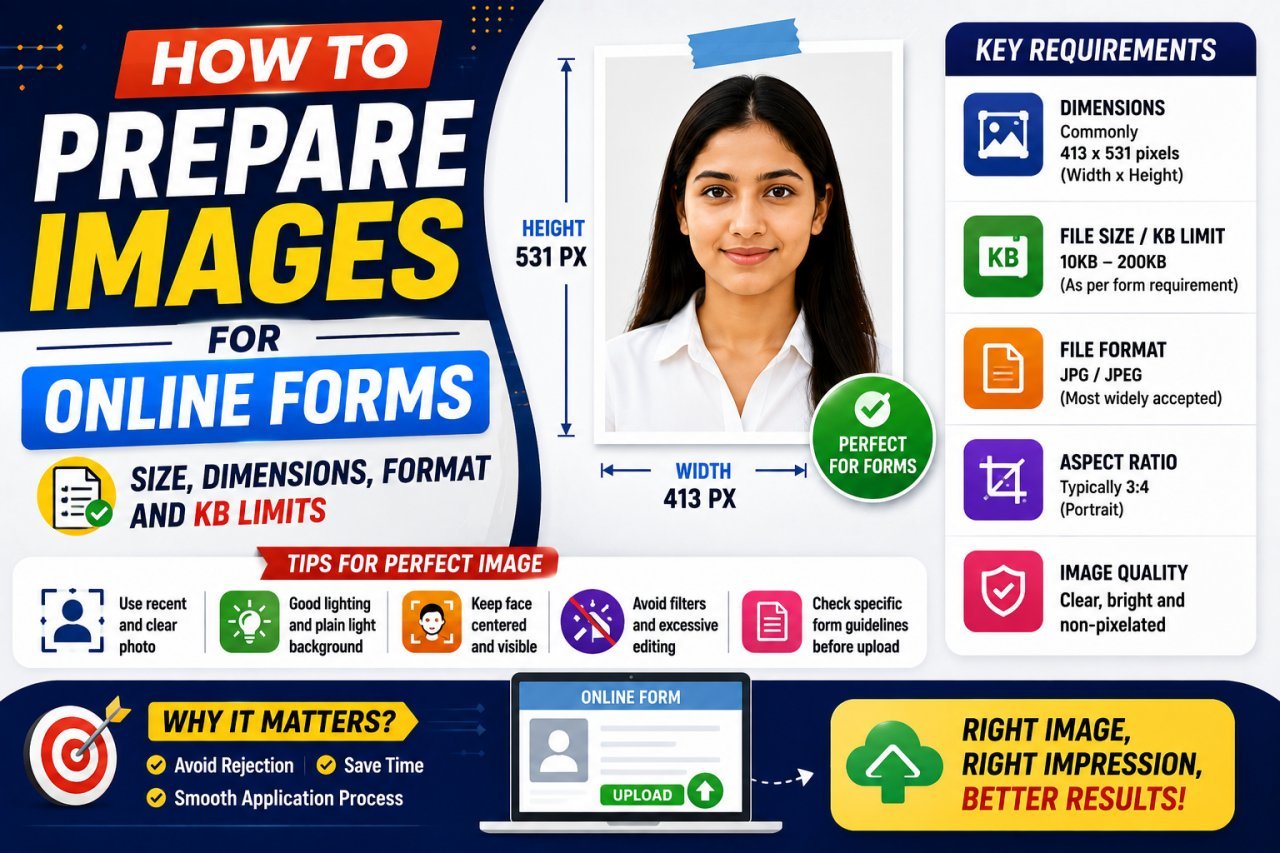
How to Prepare Images for Online Forms: Size, Dimensions, Format and KB Limits
Introduction
Uploading a photo to an online form sounds simple.
Choose a file, click Upload, and move on.
But sometimes the form refuses the image with messages such as:
- "File size too large"
- "Invalid image format"
- "Image dimensions not supported"
- "Maximum file size exceeded"
- "Please upload a JPG image"
- "Photo resolution is too low"
The frustrating part is that your photo may look perfectly fine on your phone or computer.
The problem is usually not the photograph itself. It is the technical specifications of the file.
An online form may require a particular combination of:
- Width and height in pixels
- Physical dimensions
- JPG, JPEG, PNG, or another format
- Maximum file size in KB or MB
- Minimum image quality
- Specific aspect ratio
- Maximum or minimum resolution
This guide explains how to prepare an image before uploading it to almost any online form.
Whether you're uploading a passport photo, ID image, profile picture, signature, document scan, application photo, or another image, understanding these requirements can save you time and prevent unnecessary upload errors.
What Does "Image Size for Online Forms" Mean?
The phrase image size for online forms can mean several different things.
This is where many people get confused.
When a website says "image size," it might be referring to:
Pixel Dimensions
Example:
600 × 600 pixels
This describes the width and height of the digital image.
File Size
Example:
100KB
This describes how much storage the image uses.
Physical Dimensions
Example:
35 × 45 mm
This describes the printed size of the image.
File Format
Example:
JPG
This describes how the image is saved.
These are different requirements.
A form might require:
JPG, maximum 100KB, 600 × 600 pixels
To successfully upload the image, you need to satisfy all three.
Image Dimensions vs File Size
This is one of the most important concepts to understand.
Imagine you have an image that is:
3000 × 4000 pixels
Its file size might be:
2.5MB
Now resize it to:
600 × 800 pixels
Its file size may become much smaller.
But pixel dimensions and file size are still separate properties.
An image can have:
600 × 800 pixels + 150KB
or:
600 × 800 pixels + 500KB
depending on the image content and compression settings.
So when an online form gives both a pixel requirement and a KB limit, you must check both.
Why Online Forms Have Image Size Limits
Websites often place restrictions on uploaded files for practical reasons.
Smaller files can be easier for a website to receive, process, store, and display.
For users, a file-size limit can also make uploads faster, especially on slower internet connections.
That's why you may see requirements such as:
- Maximum 50KB
- Maximum 100KB
- Maximum 200KB
- Maximum 500KB
- Maximum 1MB
- Maximum 2MB
The exact limit depends on the website.
Never assume that a 100KB limit applies everywhere.
Common Image Requirements for Online Forms
Online forms can use many different specifications.
Here are examples of requirements you may encounter:
| Requirement | Example |
|---|---|
| Width × Height | 600 × 800 px |
| Square image | 600 × 600 px |
| Physical size | 35 × 45 mm |
| Maximum file size | 100KB |
| Maximum file size | 500KB |
| Format | JPG/JPEG |
| Format | PNG |
| Aspect ratio | 1:1 |
| Aspect ratio | 3:4 |
| Minimum resolution | Application-specific |
The correct setting is always the one specified by the particular website or application.
How to Read an Online Form's Image Requirements
Suppose a form says:
Upload a JPG image, 300 × 400 pixels, maximum 100KB.
Break it down into three parts.
1. JPG
Your file format must be JPG or JPEG according to the site's instructions.
2. 300 × 400 Pixels
Your image must have:
300 pixels wide
and
400 pixels high
3. Maximum 100KB
The final file must not exceed:
100KB
So a file that is:
300 × 400 pixels + 150KB
could still be rejected.
Likewise, a:
500 × 700 pixel image + 80KB
could also be rejected if the form requires exact dimensions.
What Is the Best Image Size for Online Forms?
There is no single "best" image size for every online form.
The correct size depends on the website.
However, many forms commonly specify requirements in one or more of these areas:
- Pixel dimensions
- Maximum file size
- File format
- Aspect ratio
If the form gives exact dimensions, follow them.
If it only gives a maximum file size, you may have more flexibility.
If it says only "upload a photo," check whether the website provides additional instructions, examples, or help documentation.
Common Image Sizes You May See
Here are some examples of digital image dimensions:
| Image Size | Typical Shape |
|---|---|
| 200 × 200 px | Square |
| 300 × 400 px | Portrait |
| 400 × 600 px | Portrait |
| 600 × 600 px | Square |
| 600 × 800 px | Portrait |
| 800 × 600 px | Landscape |
| 1200 × 800 px | Landscape |
These are examples, not universal online-form requirements.
A form may require completely different dimensions.
How to Prepare an Image for an Online Form
A reliable preparation process is:
Step 1: Read the Requirements
Find out:
- Required dimensions
- Maximum file size
- Accepted format
- Minimum dimensions
- Aspect ratio
- Background or photo rules
Step 2: Start With the Original Image
Use the highest-quality suitable original you have.
Avoid repeatedly editing an already compressed image.
Step 3: Crop if Necessary
If the required aspect ratio is different from your original photo, crop it first.
Step 4: Resize
Set the image to the required pixel dimensions.
Step 5: Convert the Format
Save it as JPG, PNG, or another accepted format.
Step 6: Compress
If the file is too large, reduce its file size while keeping the required dimensions.
Step 7: Verify
Check the final:
- Width
- Height
- File format
- File size
Then upload it.
Why You Should Crop Before Resizing
Suppose your original image is:
4000 × 3000 pixels
That's a:
4:3 aspect ratio
But the online form requires:
600 × 800 pixels
That's a:
3:4 aspect ratio
If you directly force the 4000 × 3000 image into 600 × 800, the image can look stretched.
A better workflow is:
Original photo
↓
Crop to 3:4
↓
Resize to 600 × 800
This maintains the correct proportions.
What Is Aspect Ratio?
Aspect ratio describes the relationship between an image's width and height.
For example:
1:1
A square image.
Examples:
600 × 600
1000 × 1000
3:4
A portrait image.
Examples:
600 × 800
300 × 400
4:3
A landscape-oriented image.
Examples:
800 × 600
1200 × 900
16:9
A wide image.
Examples:
1280 × 720
1920 × 1080
When a form specifies exact dimensions, the aspect ratio is automatically determined.
How to Calculate Aspect Ratio
You can simplify the width and height using their common divisor.
For:
600 × 800
both numbers can be divided by 200:
600 ÷ 200 = 3
800 ÷ 200 = 4
So:
600 × 800 = 3:4
For:
600 × 600
the ratio is:
1:1
Understanding aspect ratio is useful when cropping images before resizing.
JPG vs PNG for Online Forms
The format you choose can affect both compatibility and file size.
| Feature | JPG/JPEG | PNG |
|---|---|---|
| Best for photographs | Yes | Usually |
| File size for photos | Often smaller | Often larger |
| Lossy compression | Yes | No |
| Transparency | No | Yes |
| Commonly accepted | Very common | Common, but varies |
| Good for small photo uploads | Often | Depends on requirements |
If an online form specifically asks for JPG, use JPG.
If it asks for PNG, use PNG.
Do not change the format simply because another format produces a smaller file.
What Is the Difference Between JPG and JPEG?
For most everyday purposes, JPG and JPEG refer to the same image format.
The difference comes mainly from the file extension.
You may see:
photo.jpg
or:
photo.jpeg
Both commonly represent JPEG images.
However, if a website gives very specific instructions, follow its stated format.
What Does KB Mean?
KB means kilobyte.
It is commonly used to describe file size.
For example:
- 50KB
- 100KB
- 200KB
- 500KB
When a website says:
Maximum file size: 100KB
your image needs to stay within that limit.
A file of:
98KB
is below the limit.
A file of:
125KB
is above it.
Always pay attention to whether the website specifies KB or MB.
KB vs MB: Don't Mix Them Up
1 MB is much larger than 1 KB.
For practical file-upload purposes, you can think of:
1 MB ≈ 1,000 KB
Although the exact binary definitions used by computers can differ.
So if a form says:
Maximum 1MB
that is very different from:
Maximum 100KB
Always read the unit carefully.
How to Reduce Image Size to a Specific KB
Suppose the form says:
Maximum 100KB
but your image is:
750KB
You can reduce the file size using image compression.
A useful workflow is:
Crop
↓
Resize
↓
Save in the required format
↓
Compress
↓
Check file size
If the file is still too large, increase compression gradually.
Avoid destroying image quality just to reach an arbitrary tiny file size.
Should You Resize or Compress First?
It depends on the requirements.
If the image has unnecessarily large pixel dimensions, resize first.
For example:
4000 × 3000 px
may be much larger than needed for a form.
If the form requires:
800 × 600 px
resize it first.
Then compress the resulting image if necessary.
Recommended Workflow
Crop → Resize → Compress → Verify
This usually gives you better control than compressing a huge original file first.
Example: Preparing a Photo for a 100KB Limit
Suppose your original photograph is:
4000 × 3000 px
and:
2.8MB
The form requires:
- JPG
- 600 × 800 pixels
- Maximum 100KB
A practical workflow would be:
Step 1
Crop the image to the required 3:4 ratio.
Step 2
Resize it to:
600 × 800 pixels
Step 3
Export as JPG.
Step 4
Check the file size.
If it is:
180KB
compress it further.
Step 5
Continue until the file is below:
100KB
while keeping the image visually clear.
What If the Image Is Already Below the KB Limit?
Don't compress it unnecessarily.
Suppose the form allows:
500KB
and your image is:
220KB
If the dimensions and format are also correct, there may be no reason to make it smaller.
More compression can reduce image quality.
The goal is not always:
smallest possible file
The goal is:
small enough to meet the requirement while retaining appropriate quality.
What If the Image Is Too Small?
Suppose the form requires:
600 × 800 pixels
but your image is:
300 × 400 pixels
Simply enlarging it to 600 × 800 may make it softer.
Whenever possible, go back to the original high-resolution photograph and prepare the final image from that source.
This gives you a better starting point.
What If the Image Is Too Large?
Suppose your original is:
5000 × 4000 pixels
but the form only requires:
600 × 800 pixels
You probably do not need to upload the original.
Crop it to the required ratio and resize it.
This can dramatically reduce the final file size while keeping enough detail for the form.
Online Form Image Preparation Checklist
Before uploading, check these four major areas:
Dimensions
Width × height in pixels
Example:
600 × 800 px
Format
Example:
JPG
File Size
Example:
Under 100KB
Quality
The image should remain clear enough for the purpose of the form.
If the form has additional requirements, check those too.
Common Online Form Image Requirements
You may encounter instructions such as:
Photo: 200 × 200 pixels, JPG, maximum 50KB
or:
Upload image between 100KB and 500KB
or:
JPG only, maximum 2MB
or:
Image must be at least 600 pixels wide
Each instruction means something different.
Never focus only on the KB limit.
Read the complete requirement before editing your image.
Quick Example: Understanding a Full Requirement
Imagine an online application says:
Upload a JPG image, 400 × 600 pixels, maximum 200KB.
Your final image must have:
Width: 400 px
Height: 600 px
Aspect ratio: 2:3
Format: JPG
Maximum file size: 200KB
A file that is:
400 × 600 px + 150KB + JPG
meets those technical conditions.
A file that is:
1000 × 1500 px + 150KB + JPG
may fail if the dimensions must be exact.
A file that is:
400 × 600 px + 350KB + JPG
may fail because it exceeds the file-size limit.
This is why every requirement should be checked separately.
The Golden Rule for Online Form Images
When preparing an image for an online form, remember:
Read → Crop → Resize → Format → Compress → Verify
Don't guess the required dimensions.
Don't assume every website accepts JPG.
Don't confuse pixels with KB.
And don't compress the image more than necessary.
The exact instructions shown by the website should always be your final reference.
How to Prepare Images for Different Online Form Requirements
Not every online form asks for the same type of image.
A university application may request a profile photo. A government portal may ask for an ID photograph. A job application may need a resume photo or scanned document. Another website may require a handwritten signature.
The correct preparation depends on what you are uploading.
20KB Image Uploads
A 20KB limit is very small.
If a website specifically requires an image under 20KB, simply reducing the quality of a large photograph may not be enough.
A better approach is:
- Crop unnecessary areas.
- Reduce the pixel dimensions if permitted.
- Save as JPG when allowed.
- Compress gradually.
- Check the final file size.
Example
Original:
4000 × 3000 px — 2.5MB
Target:
300 × 225 px — under 20KB
The exact result depends on the image and compression settings.
Do not use a 20KB target if the website also requires larger minimum dimensions.
50KB Image Uploads
A 50KB limit is common for small photographs, signatures, and certain application uploads.
For a 50KB requirement, start by checking whether the dimensions are specified.
If the form says:
Maximum 50KB
but does not specify pixels, you may have more flexibility.
If it says:
300 × 400 pixels, maximum 50KB
both requirements must be satisfied.
Recommended Workflow
Crop → Resize → JPG → Compress → Check
Avoid repeatedly saving the same JPEG because repeated lossy compression can reduce quality.
100KB Image Uploads
A 100KB limit gives you more room than 20KB or 50KB, but a modern high-resolution photograph can still be much larger.
For example:
Original: 3MB
Target: Under 100KB
Start by reducing unnecessary pixel dimensions.
Then use compression.
If the final image is 95KB and still looks clear enough for its purpose, there is usually no benefit in forcing it down to 40KB.
200KB Image Uploads
A 200KB limit is often easier to meet while preserving reasonable image quality.
If the original image is:
3000 × 4000 px
and the form needs only:
600 × 800 px
resize it first.
After resizing, the file may already be close to the required size.
If it is still too large, use moderate JPG compression.
500KB Image Uploads
A 500KB limit provides more flexibility.
If your image is:
450KB
and the requirements are already satisfied, you probably do not need additional compression.
If your image is:
1.8MB
you can often reduce its dimensions and then compress it.
The important point is:
Do not optimize for the smallest possible file. Optimize for the required file size and acceptable quality.
1MB Image Uploads
A 1MB limit is much more generous than a 50KB or 100KB limit.
For ordinary form photographs, you may not need aggressive compression.
However, if your source image is several megabytes, resizing it to sensible dimensions can still make uploading faster and easier.
Always check whether the form specifies a maximum pixel dimension as well as a maximum file size.
Comparison: Common KB Limits
| Maximum Size | Compression Difficulty | Typical Approach |
|---|---|---|
| 20KB | Very high | Resize + strong optimization |
| 50KB | High | Resize + compression |
| 100KB | Moderate | Resize + moderate compression |
| 200KB | Moderate | Resize + light/moderate compression |
| 500KB | Easier | Resize if necessary |
| 1MB | Usually easier | Resize only when needed |
These are practical guidelines, not universal requirements.
How to Prepare a Passport Photo for an Online Form
Passport photos often have more requirements than a normal profile image.
You may need to consider:
- Physical dimensions
- Pixel dimensions
- Aspect ratio
- Background
- Face position
- File format
- File size
For example, if an application requires a square photo:
Crop to 1:1
Then resize to the required pixel dimensions.
If it requires a portrait ratio:
Crop to the required portrait ratio
Then resize.
Do not stretch the image to fit.
How to Prepare an ID Card Image
ID cards and identity documents are different from portrait photographs.
For a document scan or ID image, readability is often more important than making the file extremely small.
Before uploading:
- Make sure all important text is visible.
- Keep the document edges inside the image.
- Avoid glare.
- Avoid excessive compression.
- Make sure the image is not rotated incorrectly.
- Check that the required file format is accepted.
If the website has a strict KB limit, reduce dimensions and compression gradually while checking whether the text remains readable.
How to Prepare a Signature Image
Signature uploads often have different requirements from photographs.
A form may specify:
- JPG or PNG
- Specific pixel dimensions
- Maximum KB
- White background
- Specific aspect ratio
If transparency is specifically accepted and useful, PNG may be appropriate.
If the website requires JPG, use JPG instead.
Signature Workflow
Write clearly
↓
Capture or scan
↓
Crop unnecessary space
↓
Resize
↓
Convert to required format
↓
Compress
↓
Check KB limit
A common mistake is leaving a huge amount of blank space around the signature.
Cropping that unnecessary area can reduce the image dimensions and make the signature easier to position.
How to Prepare a Scanned Document
Scanned documents can become surprisingly large.
A full-page scan at high resolution may produce a multi-megabyte image.
If the online form has a strict size limit:
First
Check whether the website accepts PDF instead of an image.
If an image is required
Crop unnecessary borders.
Then reduce the resolution if the text remains readable.
Finally, compress the image.
For documents containing small text, avoid excessive compression because text can become difficult to read.
JPG vs PNG: Which Should You Choose?
The correct answer depends on the form.
Choose JPG When:
- The website requires JPG/JPEG.
- You are uploading a normal photograph.
- A small file size is important.
- Transparency is not required.
Choose PNG When:
- The website specifically requires PNG.
- Transparency is needed and supported.
- You are uploading graphics or certain signature images.
- Lossless compression is important.
Simple Rule
Follow the website's accepted formats first.
Do not choose a format only because it produces the smallest file.
Compression vs Resizing: What's the Difference?
These two actions solve different problems.
Resizing
Resizing changes the pixel dimensions.
Example:
3000 × 4000 px
becomes:
600 × 800 px
This reduces the number of pixels.
Compression
Compression reduces the amount of data used to store the image.
Example:
600 × 800 px — 350KB
becomes:
600 × 800 px — 120KB
The pixel dimensions remain the same.
Remember
Resize = changes dimensions
Compress = changes file size
Sometimes you need both.
Which Should You Do First?
In most cases:
Crop → Resize → Compress
This gives you a clean workflow.
Why?
If your original is unnecessarily huge, compressing it first may waste time and produce a file that is still much larger than necessary.
Reducing the dimensions first removes pixels that the online form does not need.
Then compression can fine-tune the final file size.
Example: Fixing a "File Too Large" Error
Suppose your form allows:
Maximum 200KB
Your image is:
2.4MB
and:
4000 × 3000 pixels
Step 1
Check whether the form specifies required dimensions.
Step 2
If it requires:
800 × 600 pixels
resize it.
Step 3
Save as JPG if JPG is accepted.
Step 4
Check the file size.
Suppose the result is:
340KB
Step 5
Compress it moderately.
Suppose the final result is:
175KB
Now the image is below the 200KB limit.
Step 6
Open the final file and inspect it.
Make sure the image still looks clear enough.
Example: Fixing an "Invalid Dimensions" Error
Suppose the form requires:
400 × 600 pixels
but your image is:
600 × 600 pixels
The file might be small enough, but the dimensions are wrong.
Changing the file compression will not solve the problem.
You need to:
Crop to 2:3
then:
Resize to 400 × 600 pixels
Then check the file size again.
This is a good example of why pixel dimensions and file size are separate requirements.
Example: Fixing an "Unsupported Format" Error
Suppose the form says:
JPG only
but your image is:
photo.png
The solution is not simply to rename:
photo.png → photo.jpg
That does not convert the actual image format.
Instead, open or export the image as a real JPEG file.
Then verify the resulting file.
Example: Image Looks Blurry After Compression
Suppose your original image looks sharp.
After compression, the face or text looks blurry.
The compression level may be too aggressive.
Try:
- Start with the original.
- Resize to the required dimensions.
- Use less aggressive compression.
- Check the file size.
- Stop once the image meets the requirement.
Do not keep compressing the same already-compressed file.
How to Prepare an Image Without Losing More Quality Than Necessary
You cannot make an image infinitely smaller without trade-offs.
A practical approach is to remove unnecessary data while preserving useful visual information.
Use These Techniques
- Start with the original.
- Crop unnecessary areas.
- Resize to the required dimensions.
- Choose an appropriate format.
- Use moderate compression.
- Avoid repeated JPEG exports.
- Keep a backup of the original.
This gives you more control over the final result.
Pros and Cons of Different Image Preparation Methods
| Method | Pros | Cons |
|---|---|---|
| Resize | Reduces dimensions and often file size | Can reduce detail if made too small |
| Compress | Reduces file size quickly | Too much compression can reduce quality |
| Crop | Removes unnecessary areas | Can remove important content if done carelessly |
| Convert to JPG | Often useful for photographs | Uses lossy compression |
| Convert to PNG | Preserves image data well | Can create larger files for photos |
| Online tools | Fast and convenient | Privacy and feature differences |
| Desktop software | More control | Takes more time to learn |
Online Tool vs Desktop Software
Online Image Tool
Advantages
- No installation
- Quick
- Convenient
- Easy for beginners
- Useful for one-off uploads
Disadvantages
- You may need to upload the image to a third-party server.
- Features differ between services.
- Privacy policies vary.
- Some tools may add unnecessary compression.
For sensitive identity documents, review the service's privacy practices before uploading.
Desktop Software
Advantages
- More control
- Better export settings
- Useful for repeated work
- Files can remain on your computer
Disadvantages
- More complicated
- May require installation
- Some professional software can be expensive
Choose the method that matches your needs and the sensitivity of the image.
How to Keep Image Quality While Meeting a KB Limit
If a form has a strict limit, use a controlled process.
Step 1
Start with the original.
Step 2
Crop unnecessary content.
Step 3
Resize to the required dimensions.
Step 4
Export in the required format.
Step 5
Check the file size.
Step 6
If necessary, compress gradually.
Step 7
Inspect the final image at normal viewing size.
Step 8
Stop once the image meets the requirements.
You do not need to make a 200KB image into 50KB if the form allows up to 200KB.
Common Mistakes When Preparing Online Form Images
Mistake 1: Only Checking KB
A file may be under the size limit but still have incorrect dimensions.
Fix: Check pixels and KB separately.
Mistake 2: Only Checking Pixels
A photo can have exactly the right dimensions and still exceed the maximum file size.
Fix: Check both.
Mistake 3: Stretching the Image
Changing width and height independently can distort faces, signatures, or documents.
Fix: Crop to the correct ratio before resizing.
Mistake 4: Renaming File Extensions
Changing .png to .jpg in the filename does not convert the image.
Fix: Export or convert the actual image format.
Mistake 5: Compressing Too Much
Trying to reach an extremely small file can destroy useful details.
Fix: Use the largest file size allowed when quality matters and the requirements permit it.
Mistake 6: Using the Wrong Format
A PNG file may be rejected when the form accepts only JPG.
Fix: Follow the listed formats.
Mistake 7: Using a Screenshot
Screenshots may introduce unnecessary dimensions, compression, or quality issues.
Fix: Use the original photograph or document whenever possible.
Mistake 8: Repeatedly Editing the Same JPEG
Repeated JPEG exports can accumulate quality loss.
Fix: Keep the original and create the final version from it.
Best Practices for Online Form Images
Read the complete requirement
Don't focus only on the first number you see.
Keep the original
Always preserve an untouched copy.
Crop before resizing
This prevents unnecessary distortion.
Resize before fine-tuning compression
This usually gives better control over file size.
Follow the required format
Use JPG, PNG, PDF, or another format exactly as specified.
Check the final file
Do not assume your editing software produced the expected result.
Don't over-compress
A smaller file isn't automatically a better file.
Verify sensitive uploads
For identity documents, consider privacy and security before using third-party online tools.
A Universal Online Form Image Workflow
When you're unsure what to do, follow this sequence:
1. Read the requirements
↓
2. Identify pixel dimensions
↓
3. Identify file-size limit
↓
4. Identify accepted format
↓
5. Identify aspect ratio
↓
6. Start with the original
↓
7. Crop
↓
8. Resize
↓
9. Convert format if necessary
↓
10. Compress
↓
11. Check dimensions
↓
12. Check file size
↓
13. Open the final image
↓
14. Upload
This workflow covers most common image-upload situations.
Quick Troubleshooting Table
| Problem | Likely Cause | Solution |
|---|---|---|
| File too large | Too much image data | Resize and/or compress |
| Wrong dimensions | Incorrect pixel size | Crop and resize |
| Image stretched | Wrong aspect ratio | Crop before resizing |
| Unsupported format | Wrong file type | Export to accepted format |
| Image blurry | Too much compression or enlargement | Use original and reduce compression |
| File too small in pixels | Source is low resolution | Use a higher-resolution original |
| Signature has too much empty space | Poor crop | Crop unnecessary margins |
| Document text is unreadable | Excessive resizing/compression | Keep higher dimensions and quality |
The Best Rule for Any Online Form
Don't ask:
"What is the smallest image I can make?"
Ask:
"What exact image does this form require?"
Then meet those requirements as efficiently as possible.
That small change in approach makes image preparation much easier.
A good final image is not necessarily the smallest file.
It is the image that:
meets the required dimensions + uses an accepted format + stays within the KB/MB limit + remains suitable for its purpose.
Preparing an image for an online form is much easier when you stop treating "image size" as a single measurement.
A form may care about several things at the same time:
- Pixel dimensions
- Aspect ratio
- File format
- Maximum file size
- Minimum file size
- Image quality
- Physical dimensions
- Photo or document-specific requirements
For example, a website may require a JPG image that is 600 × 800 pixels and below 200KB. In that situation, getting the file below 200KB is only part of the job. The image must also have the correct dimensions and format.
The safest workflow is:
Read the requirements → Crop → Resize → Convert → Compress → Verify → Upload
Start with the highest-quality original available. Crop unnecessary areas first, resize to the required pixel dimensions, then reduce the file size only as much as necessary.
If a website provides exact requirements, those instructions should always take priority over generic image-size guides.
And remember one important rule:
Don't aim for the smallest possible image. Aim for the smallest image that still meets the form's requirements and remains suitable for its purpose.
1. What is the best image size for online forms?
There is no universal image size for every online form. The correct size depends on the website's requirements for pixels, file size, format, and aspect ratio. Always follow the specific instructions shown on the form.
2. What does image size mean on an online form?
"Image size" can refer to pixel dimensions, physical dimensions, or file size. For example, 600 × 800 pixels describes dimensions, while 100KB describes the amount of storage used by the image.
3. How do I reduce an image to 100KB for an online form?
Start with the original image, crop unnecessary areas, resize it to the required dimensions, save it in the required format, and then compress it until the file is below 100KB while maintaining suitable quality.
4. Should I resize or compress an image first?
In many situations, it is better to crop and resize first, then compress. Resizing removes unnecessary pixels, while compression reduces the amount of data used to store the image.
5. What image format is best for online forms?
The best format is the one accepted by the specific website. JPG or JPEG is commonly used for photographs, while PNG may be appropriate for certain graphics or images requiring transparency.
6. How do I resize an image without stretching it?
Crop the image to the required aspect ratio before changing its pixel dimensions. Then resize it to the required width and height. This helps prevent faces, signatures, and other content from becoming distorted.
7. Why does my image have the correct pixels but still get rejected?
The form may also check file size, format, aspect ratio, minimum or maximum dimensions, or other image requirements. Check every requirement instead of checking only the pixel dimensions.
8. How can I make an image smaller without making it blurry?
Start with a high-quality original, crop unnecessary areas, resize only to the required dimensions, and use moderate compression. Avoid repeatedly compressing the same JPEG file.
9. Can I upload a PNG if the form asks for JPG?
Usually not if the website specifically requires JPG. Convert or export the image as an actual JPEG file rather than simply changing the filename extension.
10. What should I do if my online form says "file too large"?
Check the maximum KB or MB limit first. Then resize the image if its pixel dimensions are unnecessarily large and compress it gradually until it meets the file-size requirement. Also verify that the dimensions and format remain correct.
Ready to optimize your images?
Every tool mentioned in this article is free to use. No upload, no signup, and no watermarks — ever.
Try our free toolsRelated articles
How to Optimize Images for SEO and Faster Website Loading
Learn how to optimize images for SEO and faster website loading. Discover image compression, WebP and AVIF, image dimensions, alt text, lazy loading, responsive images, file naming, and practical image SEO tips.
How to Compress an Image to 50KB Without Losing Quality
Learn how to compress an image to 50KB without losing quality using resizing, compression, WebP, JPG, and practical online image optimization techniques.
How to Reduce Image Size in KB Without Losing Quality
Learn how to reduce image size in KB without losing quality using smart compression, resizing, format selection, and practical image optimization techniques.