
Passport Photo Size in Pixels: Country Guide
Need the correct passport photo size in pixels? This complete guide explains common passport photo dimensions for the USA, UK, Canada, India, Australia, and other countries, plus DPI, aspect ratio, file size, cropping, and online upload requirements.
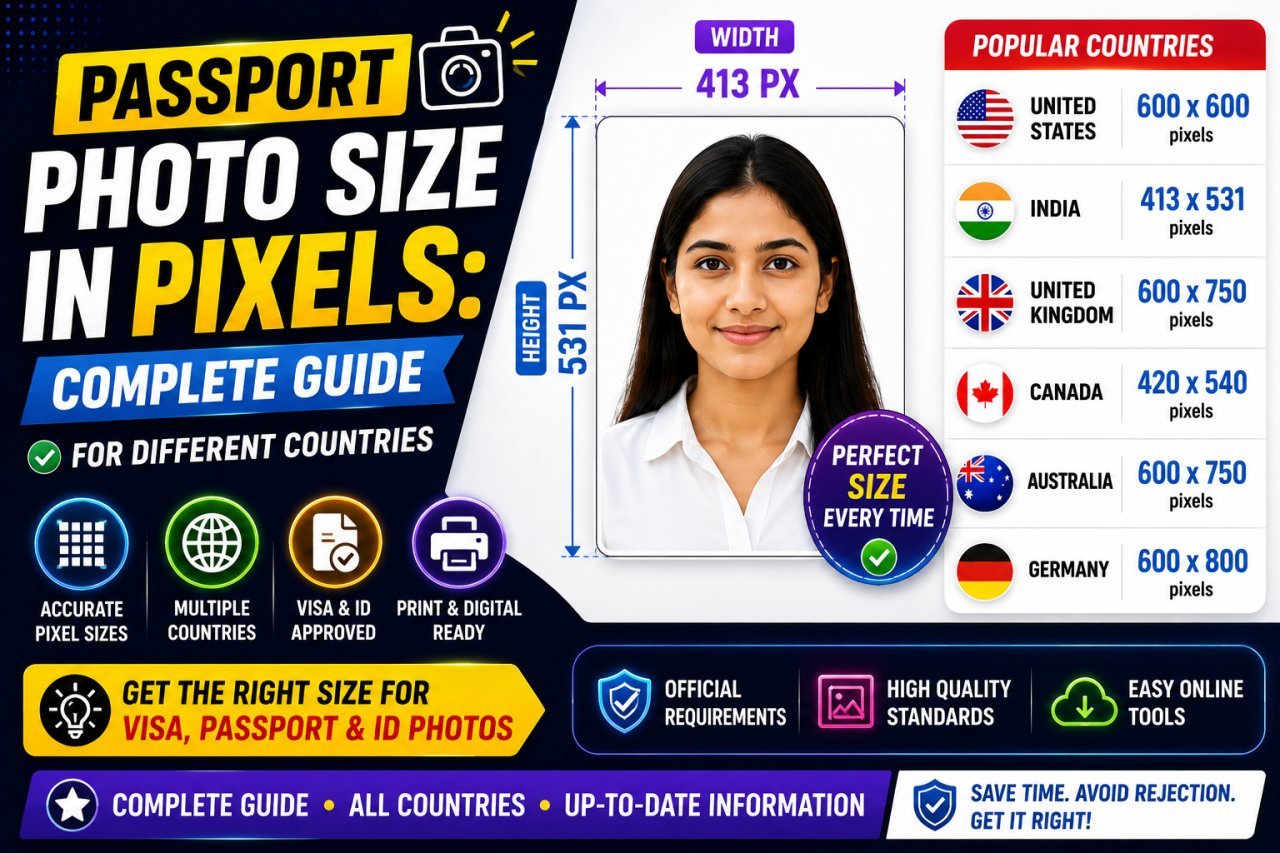
Passport Photo Size in Pixels: Complete Guide for Different Countries
Introduction
Finding the correct passport photo size in pixels can be confusing.
One website may ask for a photo in inches, another may specify millimeters, and an online application may only mention pixels and a maximum file size.
You may also see requirements such as:
- 35 × 45 mm
- 2 × 2 inches
- 600 × 600 pixels
- 35 × 45 pixels
- 300 DPI
- Maximum 100KB
- JPG or JPEG format
These numbers are not interchangeable.
The correct passport photo depends on the country, application, photo type, and submission method.
This guide explains how passport photo dimensions work, how to convert physical measurements into pixels, and what to check before uploading or printing your photo.
Important: Passport and visa photo requirements can change. When submitting an official application, always compare your final image with the current requirements published by the relevant government or application authority.
What Is Passport Photo Size in Pixels?
A passport photo's pixel size describes its digital dimensions.
For example:
600 × 600 pixels
means:
- Width: 600 pixels
- Height: 600 pixels
It does not automatically tell you the physical printed size.
A digital image can have the same number of pixels but be printed at different physical dimensions depending on the resolution.
That's why passport photo requirements can include several separate measurements.
The Four Measurements You Should Know
| Measurement | What It Tells You |
|---|---|
| Pixels | Digital image dimensions |
| mm/cm/inches | Physical photo dimensions |
| DPI/PPI | Resolution relationship between pixels and physical size |
| KB/MB | File size |
For example, an application might require:
35 × 45 mm + specific pixel dimensions + JPG + maximum file size
You need to satisfy all of those requirements, not just one.
Why Passport Photo Pixel Size Matters
A photo can look perfectly fine on your phone and still be rejected by an online application.
Why?
Because automated upload systems may check things such as:
- Image dimensions
- File format
- File size
- Aspect ratio
- Background
- Face position
- Image quality
For example, if an application requires a square image and you upload a portrait rectangle, the system may reject it even though the photograph itself looks clear.
Similarly, a photo may have the correct dimensions but exceed the maximum file size.
That's why understanding the complete specification matters.
Passport Photo Size Is Different by Country
There is no single passport photo size that works worldwide.
Different countries and authorities use different requirements.
For example, a common U.S. passport photo format is:
2 × 2 inches
which is a square photograph.
Many other passport systems commonly use a portrait format around:
35 × 45 mm
But even when two countries use similar physical dimensions, their digital submission requirements can differ.
The safest approach is to check the specific country's current official requirements before preparing the final image.
Common Passport Photo Sizes at a Glance
The following table provides useful reference points.
| Country / Region | Common Physical Format | Shape |
|---|---|---|
| United States | 2 × 2 inches | Square |
| United Kingdom | 35 × 45 mm | Portrait |
| Canada | 50 × 70 mm | Portrait |
| India | Requirements vary by application | Application-specific |
| Australia | Requirements vary by passport application | Portrait |
| European countries | Often around 35 × 45 mm | Portrait |
| Schengen visa applications | Commonly 35 × 45 mm | Portrait |
These are general reference formats, not a replacement for the current official requirements of a specific passport or visa application.
Some countries and applications have additional rules for digital photographs.
United States Passport Photo Size in Pixels
The standard U.S. passport photo format is:
2 × 2 inches
That means the image is square.
For digital applications or image preparation, the required pixel dimensions can depend on the specific submission method.
A square image might therefore be prepared at a square pixel dimension such as:
600 × 600 pixels
But you should not assume that every U.S. government digital photo submission accepts that exact specification.
Always check the current official application requirements.
U.S. Photo Shape
The most important visual point is:
2 inches wide × 2 inches tall
So the aspect ratio is:
1:1
If your source photo is rectangular, crop it to a square before preparing the final image.
10 AI Image Editing Tasks You Can Complete in Under 30 Seconds
United Kingdom Passport Photo Size in Pixels
A commonly used UK passport photo format is:
35 × 45 mm
This is a portrait image.
The aspect ratio is:
35:45
which simplifies to:
7:9
For digital preparation, the exact pixel dimensions depend on the application's requirements and image-resolution workflow.
For example, at approximately 300 DPI:
35 × 45 mm ≈ 413 × 531 pixels
This conversion is useful as a reference, but the current UK application instructions should take priority if they specify different digital requirements.
Canada Passport Photo Size in Pixels
Canadian passport photos commonly use:
50 × 70 mm
This is different from the 35 × 45 mm format used by several other countries.
The aspect ratio is:
5:7
That means a Canadian passport photo should not simply be cropped to the 7:9 ratio used for a 35 × 45 mm photo.
If you are preparing a Canadian passport photo, use the Canadian specification rather than assuming another country's dimensions will work.
India Passport Photo Size in Pixels
India is an important example because photo requirements can depend on the specific application.
A passport-related application may have requirements involving:
- Physical dimensions
- Pixel dimensions
- File size
- JPG format
- Background
- Face positioning
There is no single pixel number that should automatically be used for every Indian passport or related application.
If you are preparing a photo for an Indian government application, check the exact requirements shown by the relevant application portal.
Do not rely only on a generic "passport size" template.
Australia Passport Photo Size in Pixels
Australian passport photographs have specific requirements covering the photograph's physical dimensions and presentation.
For digital applications, the exact technical requirements can depend on the submission method.
If you are preparing an Australian passport photo online, check the current official instructions before selecting pixel dimensions.
A photograph that meets another country's requirements may still fail Australian requirements.
Why 300 DPI Is Often Mentioned
You may frequently see 300 DPI when researching passport photos.
DPI means:
Dots Per Inch
PPI means:
Pixels Per Inch
In digital image preparation, PPI is often the more technically relevant term for pixel-to-physical-size calculations.
The conversion formula is:
Pixels = physical size in inches × resolution
Since:
1 inch = 2.54 cm
you can convert centimeters into inches first.
For example:
35 mm = 3.5 cm
3.5 ÷ 2.54 ≈ 1.378 inches
At 300 pixels per inch:
1.378 × 300 ≈ 413 pixels
The same calculation for 45 mm gives approximately:
531 pixels
So:
35 × 45 mm at 300 PPI ≈ 413 × 531 pixels
This is a mathematical conversion, not a universal passport-photo requirement.
Passport Photo Size in Pixels: Quick Conversion Table
Here are some useful approximate conversions.
| Physical Size | 150 PPI | 300 PPI | 600 PPI |
|---|---|---|---|
| 35 × 45 mm | 207 × 266 px | 413 × 531 px | 827 × 1063 px |
| 50 × 70 mm | 295 × 413 px | 591 × 827 px | 1181 × 1654 px |
| 2 × 2 inches | 300 × 300 px | 600 × 600 px | 1200 × 1200 px |
These numbers show the mathematical relationship between physical dimensions and pixels.
They should not be treated as universal upload requirements.
If the application gives you exact pixel dimensions, use those dimensions.
How to Calculate Passport Photo Pixels Yourself
You can calculate the approximate pixel size using a simple formula.
Formula
Pixels = millimeters ÷ 25.4 × PPI
For example, for a:
35 × 45 mm
photo at:
300 PPI
Width:
35 ÷ 25.4 × 300 ≈ 413 px
Height:
45 ÷ 25.4 × 300 ≈ 531 px
Result:
Approximately 413 × 531 pixels
This method works for other physical photo sizes too.
Physical Size vs Pixel Size: Simple Example
Imagine two images:
Image A
413 × 531 pixels
Image B
826 × 1062 pixels
Image B has four times as many pixels.
But that does not automatically mean Image B is the correct passport photo.
The correct dimensions depend on:
- Application requirements
- Physical size
- Resolution
- Upload rules
- Image quality
More pixels are not always better if the application specifies a smaller maximum.
What Is the Aspect Ratio of a Passport Photo?
The aspect ratio describes the relationship between width and height.
For example:
35 × 45 mm
Aspect ratio:
7:9
50 × 70 mm
Aspect ratio:
5:7
2 × 2 inches
Aspect ratio:
1:1
This is useful when cropping.
If the photo has the wrong aspect ratio, simply changing its width and height can distort the person's face.
Instead:
Crop first → Resize second
How to Resize a Passport Photo Correctly
A reliable workflow is:
Step 1: Find the official requirements
Check:
- Physical dimensions
- Pixel dimensions
- File format
- Maximum file size
- Background
- Photo age requirements
- Face positioning
Step 2: Start with a high-quality original
Avoid using a tiny or heavily compressed image.
Step 3: Select the correct crop ratio
For example:
35 × 45 mm → 7:9
50 × 70 mm → 5:7
2 × 2 inches → 1:1
Step 4: Crop carefully
Keep the subject positioned according to the official instructions.
Step 5: Resize
Enter the required pixel dimensions.
Step 6: Compress if necessary
If there is a maximum KB requirement, optimize the file without making it unnecessarily blurry.
Step 7: Verify
Check the final dimensions, format, file size, and appearance.
Why You Should Not Use One Passport Photo Template Everywhere
A common mistake is downloading one "passport size" template and using it for every application.
That can cause problems because:
- Countries use different dimensions.
- Visa photos can have different requirements.
- Online applications may use different pixel limits.
- File-size limits can vary.
- Background requirements can vary.
- Face positioning requirements can vary.
A photo that works for one application is not automatically valid for another.
Passport Photo Requirements Checklist
Before uploading your image, check these items:
- Correct country/application
- Correct physical dimensions
- Correct pixel dimensions
- Correct aspect ratio
- Correct file format
- Correct maximum file size
- Appropriate background
- Face positioned correctly
- Good lighting
- No unnecessary editing
- Final image opens correctly
This checklist is especially useful when an application rejects your image without clearly explaining the problem.
What If Your Passport Photo Is the Wrong Size?
Don't stretch it.
Instead:
1. Open the original image.
2. Choose the correct crop ratio.
3. Position the face correctly.
4. Crop the image.
5. Resize to the required pixels.
6. Compress if required.
7. Check the final file.
This produces a much cleaner result than forcing an incorrectly shaped image into the target dimensions.
Common Passport Photo Resizing Mistakes
Mistake 1: Assuming Every Passport Photo Is 2 × 2 Inches
The U.S. format is square, but many other countries use different dimensions.
Better approach:
Check the country-specific requirement.
Mistake 2: Confusing 35 × 45 mm With 35 × 45 Pixels
These are completely different measurements.
35 × 45 mm describes physical dimensions.
35 × 45 pixels describes a very small digital image.
Do not confuse them.
Mistake 3: Using the Same Pixel Size for Every Country
There is no universal passport photo pixel size.
Better approach:
Follow the exact digital specification of the application.
Mistake 4: Stretching the Photo
Changing width and height independently can distort the face.
Better approach:
Crop to the correct aspect ratio first.
Mistake 5: Ignoring File Size
An image can have correct pixels but still exceed the upload limit.
Better approach:
Check both dimensions and KB/MB.
Mistake 6: Following an Old Requirement
Government requirements can change.
Better approach:
Check the current official source before submitting.
Quick Country Comparison
| Country | Common Physical Format | Common Shape |
|---|---|---|
| USA | 2 × 2 in | Square |
| UK | 35 × 45 mm | Portrait |
| Canada | 50 × 70 mm | Portrait |
| India | Application-specific | Varies |
| Australia | Application-specific | Portrait |
| Many European applications | Around 35 × 45 mm | Portrait |
This table is intended as a starting point.
For an actual passport or visa submission, verify the current requirements for the specific application.
The Most Important Rule
If you remember only one thing from this guide, remember this:
There is no universal passport photo size in pixels.
The correct pixel dimensions depend on the physical size, resolution, application requirements, and submission method.
Before uploading your photo:
Check the official requirements → crop correctly → resize → compress → verify.
That approach is far more reliable than searching for one universal pixel number.
Passport Photo Size in Pixels: Complete Guide for Different Countries
Country-by-Country Passport Photo Guide
Passport photo requirements are not identical around the world.
Even when two countries use a similar physical size, their rules for background, face position, lighting, digital files, and upload limits may be different.
Use the following sections as a practical reference, but always verify the current official requirements before submitting an actual passport or visa application.
United States Passport Photo Size
The standard U.S. passport photo format is:
2 × 2 inches
The image is square, so the aspect ratio is:
1:1
For a digital image, a commonly used mathematical conversion at 300 PPI is:
600 × 600 pixels
However, the correct digital specifications depend on how the photo is being submitted.
Important U.S. Photo Requirements
A U.S. passport photograph generally needs to meet requirements concerning:
- Correct size
- Color photograph
- Plain or appropriate background
- Clear facial visibility
- Natural appearance
- Recent photograph
- Proper head positioning
- No inappropriate shadows or obstructions
Do not assume that simply creating a 600 × 600 pixel image guarantees acceptance.
The complete photo requirements matter.
Quick Reference
| Item | U.S. Passport Photo |
|---|---|
| Physical size | 2 × 2 inches |
| Aspect ratio | 1:1 |
| Common 300 PPI conversion | 600 × 600 px |
| Orientation | Square |
United Kingdom Passport Photo Size
A commonly used UK passport photograph has a physical size of:
35 × 45 mm
The aspect ratio is:
7:9
At approximately 300 PPI, the mathematical conversion is:
413 × 531 pixels
This is useful when preparing a physical-size image.
However, digital passport applications can have their own technical requirements.
UK Photo Preparation
When preparing the image:
- Use the correct portrait orientation.
- Maintain the 7:9 ratio.
- Keep the face clearly visible.
- Follow the current background and lighting rules.
- Check the current digital upload requirements.
Quick Reference
| Item | UK Passport Photo |
|---|---|
| Physical size | 35 × 45 mm |
| Aspect ratio | 7:9 |
| Approx. 300 PPI conversion | 413 × 531 px |
| Orientation | Portrait |
Canada Passport Photo Size
Canadian passport photos commonly use:
50 × 70 mm
The aspect ratio is:
5:7
At approximately 300 PPI:
591 × 827 pixels
This is a mathematical conversion based on the physical dimensions and 300 PPI.
It should not automatically be treated as the required digital upload size.
Quick Reference
| Item | Canadian Passport Photo |
|---|---|
| Physical size | 50 × 70 mm |
| Aspect ratio | 5:7 |
| Approx. 300 PPI conversion | 591 × 827 px |
| Orientation | Portrait |
Canada's requirements can include additional rules concerning the photograph, so verify the current official specifications before submission.
India Passport Photo Size
India is different from countries where one simple physical size can describe every passport-related digital photo.
Requirements can depend on:
- The application
- Passport service
- Online submission method
- Photo format
- Pixel dimensions
- File-size restrictions
This means there is no single pixel number that should be blindly used for every Indian passport-related application.
If the portal specifies a particular width and height, use those exact values.
Example
If an application says:
Required width: X pixels
Required height: Y pixels
then those values take priority over a generic passport-photo conversion chart.
Important Tip
Do not search only for:
"India passport photo size"
Also check the exact application instructions because passport, visa, and other government applications can have different specifications.
Australia Passport Photo Size
Australian passport photographs have their own official requirements.
The important point for digital preparation is that the photograph must satisfy the current Australian passport specifications rather than a generic international passport-photo template.
When preparing an Australian passport photo:
- Check the official dimensions.
- Follow the required background.
- Follow the face-position rules.
- Use the specified digital format when applicable.
- Check image quality.
- Confirm the current submission requirements.
Do not automatically use the 35 × 45 mm format simply because it is common in other countries.
European Passport and Visa Photos
Many European passport and visa applications commonly use a portrait format around:
35 × 45 mm
This corresponds to:
7:9 aspect ratio
However, "Europe" is not one single passport authority.
Different countries and applications can have different rules.
Visa requirements may also differ from passport requirements.
For example, a visa application handled through a particular authority may specify:
- Photo dimensions
- Background
- File format
- File size
- Digital pixel dimensions
- Face size
- Submission method
Therefore, use 35 × 45 mm as a useful reference only when the specific application calls for it.
Schengen Visa Photo Size
A common Schengen visa photograph format is:
35 × 45 mm
This is a portrait format with a:
7:9 aspect ratio
But visa applications can have additional requirements beyond physical dimensions.
Before uploading or printing a visa photograph, check the instructions associated with the specific application center or authority handling your application.
Practical Workflow
Check official instructions
↓
Crop to 7:9
↓
Set required dimensions
↓
Adjust file size if required
↓
Check background and face position
↓
Upload
Passport Photo Size Conversion Table
Here is a practical conversion reference for common physical sizes.
| Physical Size | Aspect Ratio | 300 PPI Approx. |
|---|---|---|
| 35 × 45 mm | 7:9 | 413 × 531 px |
| 50 × 70 mm | 5:7 | 591 × 827 px |
| 2 × 2 in | 1:1 | 600 × 600 px |
| 40 × 50 mm | 4:5 | 472 × 591 px |
| 30 × 40 mm | 3:4 | 354 × 472 px |
These are mathematical conversions at approximately 300 PPI.
They are not universal government upload specifications.
How to Resize a Passport Photo to Exact Pixels
Suppose your application requires:
600 × 600 pixels
but your original image is:
4000 × 3000 pixels
Do not simply change the dimensions independently.
That would distort the photo.
Instead:
Step 1
Crop the image to:
1:1
Step 2
Position the face correctly.
Step 3
Resize to:
600 × 600 pixels
Step 4
Export in the required format.
Step 5
Check the final file size.
This produces a square image without stretching the original photograph.
Example: Resize a 35 × 45 mm Photo
Suppose an application requires:
35 × 45 mm
and the digital workflow uses approximately 300 PPI.
The target is approximately:
413 × 531 pixels
Start with a larger image.
For example:
3000 × 4000 pixels
Crop it to the:
7:9 ratio
Then resize it to approximately:
413 × 531 pixels
Finally, export it using the required format.
If the application separately specifies different pixel dimensions, use those instead.
Example: Resize a Canadian 50 × 70 mm Photo
Suppose you need:
50 × 70 mm
At approximately 300 PPI:
50 ÷ 25.4 × 300 ≈ 591 pixels
70 ÷ 25.4 × 300 ≈ 827 pixels
So the mathematical conversion is approximately:
591 × 827 pixels
The aspect ratio is:
5:7
Crop first, then resize.
Example: Resize a U.S. 2 × 2 Inch Photo
The U.S. physical format is:
2 × 2 inches
At 300 PPI:
2 × 300 = 600 pixels
So:
600 × 600 pixels
The aspect ratio is:
1:1
Start with a larger photograph and crop it square before reducing it to the required dimensions.
How to Reduce Passport Photo File Size
Pixel dimensions and file size are different.
Suppose your image is:
600 × 600 pixels
but the application allows only:
100KB
The image may still be larger than allowed.
In that situation:
First
Keep the required pixel dimensions.
Second
Use an accepted image format.
Third
Adjust compression carefully.
Fourth
Check the resulting file size.
Fifth
Inspect the image for visible quality loss.
Do not immediately reduce the pixel dimensions unless the application's requirements allow you to do so.
How to Compress a Passport Photo Without Making It Blurry
Passport photographs contain important facial details.
Heavy compression can produce:
- Blurry edges
- Blocky areas
- Loss of facial detail
- Color artifacts
- Reduced clarity
A better approach is gradual compression.
For example:
Original
↓
Correct crop
↓
Correct dimensions
↓
Moderate compression
↓
Check
↓
Small adjustment if necessary
This is better than repeatedly compressing the same file.
Always keep the original photograph.
JPG vs PNG for Passport Photos
For normal photographs, JPG is usually more practical than PNG when a small file size is required.
| Feature | JPG | PNG |
|---|---|---|
| Photographs | Excellent | Good |
| File size for photos | Usually smaller | Often larger |
| Compression | Lossy | Lossless |
| Transparency | No | Yes |
| Common upload compatibility | High | High, but application-specific |
| Best choice for most passport photos | Often | Sometimes |
If the application explicitly requires JPG, use JPG.
If it requires PNG, use PNG.
The application's instructions should always take priority.
What About WebP?
WebP can produce efficient image files and is useful for many websites.
However, passport and government application systems may not accept it.
For that reason:
Do not convert a passport photo to WebP unless the application specifically accepts it.
For an official upload, compatibility is more important than achieving the smallest possible file.
DPI vs PPI for Passport Photos
These terms are often used interchangeably online, but they describe different concepts.
DPI
Dots per inch is traditionally associated with physical printing output.
PPI
Pixels per inch describes the relationship between digital pixels and physical dimensions.
When calculating a digital image's pixel dimensions from centimeters or inches, PPI is generally the more relevant concept.
For everyday passport-photo preparation, the practical rule is simple:
If the application gives exact pixels, use those pixels.
You do not need to calculate the pixel size yourself.
How to Check Your Passport Photo Dimensions
Before uploading, check the image properties in your image editor or file information.
Look for:
Width × Height
For example:
600 × 600 pixels
or:
413 × 531 pixels
Then check:
File size
For example:
82KB
Finally check:
File type
For example:
JPG
You want all three to match the application's requirements.
What If the Application Says "Passport Size" but Gives No Pixels?
This happens.
Do not immediately choose a random pixel size.
First determine:
- Which country?
- Which application?
- Passport or visa?
- Physical dimensions?
- Digital upload or printed photo?
- Maximum file size?
- Required format?
If the application provides an official sample or detailed instructions, use those.
If no digital dimensions are provided, the physical photo size and image-quality requirements may be more important than inventing a pixel value.
What If Your Photo Has the Wrong Background?
Resizing does not fix a background problem.
If the official requirement calls for a plain background, changing the image dimensions will not make an unsuitable background acceptable.
Before editing the photo, check:
- Background color
- Shadows
- Lighting
- Contrast
- Face visibility
For official photographs, avoid unnecessary edits that could change the person's natural appearance.
What If Your Face Looks Too Small?
Changing the overall image size does not automatically correct face positioning.
If the face appears too small:
- Return to the original.
- Crop according to the official framing requirements.
- Keep the correct aspect ratio.
- Resize the final image.
- Check the result again.
Do not zoom excessively if doing so removes required head or shoulder space.
What If Your Face Looks Too Large?
The opposite problem can happen when the crop is too tight.
Do not simply resize the entire image.
Instead, adjust the crop area.
The goal is to satisfy the application's required head position and facial proportions.
This is especially important for official identity documents because the photo is not just an ordinary portrait.
Can You Use a Phone Photo for a Passport?
A phone camera can produce a suitable source image, provided the final photograph meets the requirements of the relevant authority.
Pay attention to:
- Good lighting
- Clear focus
- Plain background
- Natural facial appearance
- Correct positioning
- No distracting shadows
- No unnecessary filters
A high-resolution source gives you more flexibility during cropping and resizing.
Why Starting With a Large Original Helps
Imagine you have two source images.
Image A
500 × 600 pixels
Image B
3000 × 4000 pixels
The larger source gives you much more flexibility when cropping.
You can select the correct area and then reduce it to the required dimensions.
With a very small source, enlarging the image may produce a softer result.
This is why it is better to preserve the original photograph whenever possible.
Common Passport Photo Problems
Photo Is Too Wide
Cause: Wrong aspect ratio.
Fix: Crop to the required ratio.
Photo Is Too Tall
Cause: Incorrect crop.
Fix: Recalculate the target ratio and crop again.
File Is Too Large
Cause: High compression efficiency is not enough or image is unnecessarily large.
Fix: Optimize the file after meeting the required dimensions.
File Is Too Small in Pixels
Cause: The source or resized image does not meet the minimum dimensions.
Fix: Return to the original high-resolution photo.
Application Rejects the Format
Cause: Unsupported file type.
Fix: Export using the required format.
Image Looks Stretched
Cause: Width and height were changed independently.
Fix: Crop proportionally before resizing.
Best Practices for Passport Photo Resizing
1. Check the country first
Never assume one passport-photo format works worldwide.
2. Check the application
Passport and visa requirements can differ.
3. Use the official source
Government requirements can change.
4. Preserve the original
Create a separate copy for editing.
5. Crop before resizing
This prevents stretching.
6. Follow the required ratio
For example:
35 × 45 mm = 7:9
7. Follow exact pixel requirements
If provided, they take priority over generic conversion tables.
8. Check file size
KB or MB limits are separate from pixel dimensions.
9. Avoid excessive compression
Keep facial details clear.
10. Inspect before submitting
Do a final check of dimensions, format, size, and appearance.
Passport Photo Preparation Workflow
Use this workflow whenever you need to create a digital passport photo:
Step 1 — Find the official requirements
↓
Step 2 — Select the original photograph
↓
Step 3 — Check background and lighting
↓
Step 4 — Select the correct aspect ratio
↓
Step 5 — Crop the photo
↓
Step 6 — Resize to required pixels
↓
Step 7 — Compress if necessary
↓
Step 8 — Check file format
↓
Step 9 — Check file size
↓
Step 10 — Inspect the final image
↓
Step 11 — Upload
This process is simple, but it prevents many of the most common passport-photo errors.
Final Comparison: Physical Size vs Pixels
| Requirement | Example | Meaning |
|---|---|---|
| Physical size | 35 × 45 mm | Printed dimensions |
| Pixels | 413 × 531 px | Digital dimensions at approx. 300 PPI |
| Aspect ratio | 7:9 | Shape of the image |
| File size | 80KB | Storage/upload size |
| Format | JPG | File type |
| Resolution | 300 PPI | Pixel-to-physical relationship |
Understanding these differences makes passport-photo preparation much easier.
Important Reminder Before Submission
A passport photograph is an official document image.
Do not assume that a generic online calculator, photo template, or old blog post has the latest requirements.
Before submitting:
Check the current official requirements for your country and application.
Then prepare the image according to those instructions.
That final verification is more important than any generic pixel chart.
Passport Photo Size in Pixels: Complete Guide for Different Countries
Passport Photo Size Quick Reference
If you only need the most important information, use this quick table as a starting point.
| Country / Format | Common Physical Size | Aspect Ratio | Approx. Pixel Size at 300 PPI |
|---|---|---|---|
| USA | 2 × 2 inches | 1:1 | 600 × 600 px |
| UK | 35 × 45 mm | 7:9 | 413 × 531 px |
| Canada | 50 × 70 mm | 5:7 | 591 × 827 px |
| Schengen | Often 35 × 45 mm | 7:9 | 413 × 531 px |
| Australia | Application-specific | Application-specific | Check current requirements |
| India | Application-specific | Application-specific | Check current requirements |
Important: The pixel values in this table are mathematical conversions at approximately 300 PPI. They are not universal digital-upload requirements.
If an official application gives you exact pixel dimensions, use those dimensions instead.
Passport Photo Size: The Three Numbers You Must Understand
Before preparing a passport photo, separate these three concepts.
1. Physical Dimensions
This tells you how large the photo is physically.
Examples:
- 35 × 45 mm
- 50 × 70 mm
- 2 × 2 inches
2. Pixel Dimensions
This tells you how large the digital image is.
Examples:
- 413 × 531 pixels
- 591 × 827 pixels
- 600 × 600 pixels
3. File Size
This tells you how much storage the image uses.
Examples:
- 50KB
- 100KB
- 500KB
- 2MB
These three measurements are related, but they are not interchangeable.
A photo can have the correct physical dimensions but the wrong pixel dimensions.
It can have the correct pixels but exceed the maximum file size.
Understanding this difference can prevent many upload problems.
How to Choose the Correct Passport Photo Size
Use this simple decision process.
Question 1: Which country is the application for?
Start here.
Do not use a U.S. passport template for a UK application or a Canadian template for another country.
Question 2: Is it a passport or visa photo?
Passport and visa requirements can differ.
Question 3: Is the photo printed or uploaded digitally?
Printed photos may focus on physical dimensions.
Digital applications may specify pixels and file size.
Question 4: Does the application provide exact pixel dimensions?
If yes, use them.
Question 5: Is there a maximum file size?
If yes, optimize the image after reaching the required dimensions.
This approach is much safer than choosing a random "passport size" preset.
Passport Photo Resizing: Best Workflow
Here is the complete process in simple terms.
Step 1: Find the Current Official Requirements
Before editing anything, identify the exact requirements for your application.
Look for:
- Photo dimensions
- Pixel dimensions
- File format
- File-size limit
- Background
- Face positioning
- Lighting
- Clothing requirements
- Glasses or head-covering rules, where applicable
- Digital submission instructions
Requirements can change, so use the current official instructions.
Step 2: Select the Best Original Photo
Use the highest-quality suitable photograph you have.
Avoid starting with:
- Screenshots
- Social-media downloads
- Tiny images
- Heavily compressed copies
- Photos that have already been resized repeatedly
A larger original gives you more flexibility.
Step 3: Crop to the Correct Shape
Do not resize first if the original has the wrong aspect ratio.
For example:
35 × 45 mm → 7:9
50 × 70 mm → 5:7
2 × 2 inches → 1:1
Crop the photo while keeping the subject positioned according to the official requirements.
Step 4: Resize to the Required Pixels
Once the crop is correct, set the final pixel dimensions.
For example:
600 × 600 pixels
or:
413 × 531 pixels
depending on the actual requirements.
Step 5: Select the Correct File Format
If the application says:
JPG
use JPG.
If it says:
JPEG
a JPG/JPEG file is normally the intended format, but follow the application's exact instructions.
Do not use WebP simply because it produces a smaller file unless the application accepts it.
Step 6: Reduce File Size If Necessary
If the application has a maximum file size, compress the image carefully.
For example:
Original: 850KB
↓
Resize: Required dimensions
↓
Compress: Moderate level
↓
Final: 95KB
The exact result will depend on the image.
Step 7: Perform a Final Check
Before uploading, verify:
- Pixel dimensions
- Physical dimensions if applicable
- Aspect ratio
- File format
- File size
- Background
- Face position
- Image clarity
Only then upload the photograph.
Pros and Cons of Different Passport Photo Preparation Methods
Online Image Resizer
Pros
- Fast
- Easy for beginners
- No advanced software required
- Works in a browser
- Convenient for simple resizing
Cons
- Features vary between tools
- Some may compress automatically
- Privacy practices differ
- Physical-size settings may be limited
Desktop Photo Editor
Pros
- More control
- Precise cropping
- Precise pixel dimensions
- Better control over export quality
- Useful for repeated work
Cons
- More complicated
- May require installation
- Beginners may need time to learn the controls
Mobile Photo Editor
Pros
- Convenient
- Easy to use with phone photographs
- Useful when working entirely from a smartphone
Cons
- Some apps reduce quality automatically
- Exact DPI controls may be unavailable
- Export settings can vary
For a simple passport-photo resize, an online tool can be convenient. For sensitive documents, consider the privacy implications of uploading the photograph to a third-party service.
Common Passport Photo Mistakes to Avoid
1. Using a Generic Passport Template
A template labeled "passport size" does not necessarily match your country's requirements.
Better: Check the application first.
2. Confusing 35 × 45 mm With 35 × 45 Pixels
This is one of the easiest mistakes to make.
35 × 45 mm is a physical measurement.
35 × 45 pixels is a tiny digital image.
They are completely different.
3. Using 600 × 600 Pixels for Every Country
600 × 600 is associated with the square U.S. format in many digital workflows.
It is not a universal passport-photo size.
4. Resizing Without Cropping
If your original photo has a different shape, changing its width and height independently can distort the face.
Better:
Crop → Resize
5. Ignoring File Size
A photo may have the correct dimensions and still be rejected because it is too large.
Check the KB or MB requirement separately.
6. Compressing Too Much
A tiny file is not automatically a better file.
Excessive compression can make facial details look blurry.
Aim for the smallest file that still meets the quality requirements.
7. Starting With a Low-Resolution Image
Enlarging a small image cannot recreate details that were never captured.
Whenever possible, start with a high-resolution original.
8. Using an Old Requirement
Government websites and application systems can update their technical requirements.
Always verify the current instructions before submission.
How to Check Whether Your Passport Photo Is Ready
Use this five-minute check.
Dimensions
Does the image have the required width and height in pixels?
Ratio
Does the photo have the correct shape?
Format
Is it JPG, JPEG, PNG, or another format specifically accepted?
File Size
Is it below the maximum KB or MB?
Appearance
Is the face clear, properly positioned, and presented according to the official rules?
If all five are correct, you are much less likely to encounter a simple technical rejection.
Passport Photo Upload Checklist
Before clicking the final upload button:
- Correct country selected
- Correct application selected
- Current requirements checked
- Correct physical dimensions
- Correct pixel dimensions
- Correct aspect ratio
- Correct file format
- File size is within the limit
- Background meets requirements
- Face is correctly positioned
- Image is sharp enough
- No unnecessary filters
- Original photo is saved separately
- Final file opens correctly
What If the Application Rejects Your Photo?
Don't immediately take another photograph.
First identify the type of rejection.
"Invalid dimensions"
Check the pixel width and height.
"File too large"
Check the KB or MB.
"Unsupported format"
Export to the required format.
"Incorrect aspect ratio"
Crop the image again.
"Photo quality too low"
Return to the original high-resolution photograph.
"Background does not meet requirements"
Use a photograph that satisfies the official background rules rather than trying to fix it only through resizing.
"Face position incorrect"
Adjust the crop and framing according to the official instructions.
A Simple Passport Photo Formula
For any application, think of the final photo as:
Correct Country
Correct Application
Correct Physical Size
Correct Pixel Size
Correct Aspect Ratio
Correct File Format
Correct File Size
Correct Photo Appearance
=
Application-ready photo
The exact requirements vary, but this checklist gives you a reliable way to approach almost any passport-photo task.
Final Takeaways
- There is no single passport photo size in pixels that works worldwide.
- The correct size depends on the country and application.
- U.S. passport photos commonly use a 2 × 2 inch square format.
- UK passport photos commonly use 35 × 45 mm.
- Canadian passport photos commonly use 50 × 70 mm.
- Many European visa applications commonly use 35 × 45 mm, but requirements can vary.
- Pixel dimensions depend on physical size and resolution.
- 35 × 45 mm at 300 PPI is approximately 413 × 531 pixels.
- 50 × 70 mm at 300 PPI is approximately 591 × 827 pixels.
- 2 × 2 inches at 300 PPI is 600 × 600 pixels.
- These are mathematical conversions, not universal government upload requirements.
- If the application provides exact pixels, use those pixels.
- Crop before resizing to avoid distortion.
- Check file size separately from pixel dimensions.
- Keep the original high-quality photograph.
- Always verify the latest official requirements before submitting.
Conclusion
Finding the correct passport photo size in pixels becomes much easier once you understand that passport-photo requirements contain several different measurements.
A physical size such as 35 × 45 mm describes the dimensions of the printed photograph.
A digital size such as 413 × 531 pixels describes the number of pixels in the image.
A file size such as 100KB describes how much storage the image uses.
These values work together, but one does not automatically determine all the others.
The biggest mistake is searching for one universal passport photo pixel size and using it everywhere.
There isn't one.
The United States commonly uses a square 2 × 2 inch format, while the UK commonly uses 35 × 45 mm, Canada commonly uses 50 × 70 mm, and other countries or applications may have their own specifications.
The safest workflow is simple:
Check the official requirements → choose the correct photo → crop to the correct ratio → resize → compress if needed → verify everything → upload.
If you are preparing a passport or visa photograph, take the extra minute to verify the current official requirements. That small step is much safer than relying on a generic template or an outdated pixel chart.
Call To Action
Need to resize your passport photo for an online application?
Start by finding the exact requirements for your country and application.
Then use this workflow:
Crop → Resize → Compress → Check → Upload
Before submitting, verify the pixels, aspect ratio, file size, file format, and photo appearance.
A correctly prepared image can save you from unnecessary upload errors and having to redo the application photo.
Frequently Asked Questions
1. What is the passport photo size in pixels?
There is no universal passport photo size in pixels. The correct pixel dimensions depend on the country, application, physical photo dimensions, resolution, and digital submission requirements.
2. What is 35 × 45 mm in pixels?
At approximately 300 PPI, 35 × 45 mm converts to about 413 × 531 pixels. However, an application may specify different digital dimensions.
3. What is the U.S. passport photo size in pixels?
A 2 × 2 inch photo is mathematically equivalent to 600 × 600 pixels at 300 PPI. Always follow the current requirements for the specific U.S. submission method.
4. What is the UK passport photo size in pixels?
The common UK physical size is 35 × 45 mm. At approximately 300 PPI, that is about 413 × 531 pixels. Digital application requirements should be checked separately.
5. What is the Canadian passport photo size in pixels?
The common Canadian physical size is 50 × 70 mm. At approximately 300 PPI, this converts to about 591 × 827 pixels. Check the current Canadian requirements for the exact submission method.
6. What is the passport photo size for India?
Indian passport-related photo requirements can depend on the specific application and submission method. Check the current requirements of the relevant Indian application portal rather than relying on one generic pixel size.
7. Can I use the same passport photo size for every country?
No. Countries can use different physical dimensions, aspect ratios, pixel requirements, file-size limits, and photo rules.
8. How do I resize a passport photo without stretching it?
Crop the original image to the required aspect ratio first. Then resize the cropped image to the required pixel dimensions. This helps prevent distortion.
9. What file format is best for a passport photo?
JPG or JPEG is commonly used for photographs, but the correct format depends on the application. Always use the format specified by the relevant authority.
10. Why is my passport photo rejected even though the size is correct?
The application may check more than dimensions. The file format, file size, pixel dimensions, aspect ratio, background, facial positioning, or image quality may also be incorrect.
Ready to optimize your images?
Every tool mentioned in this article is free to use. No upload, no signup, and no watermarks — ever.
Try our free toolsRelated articles
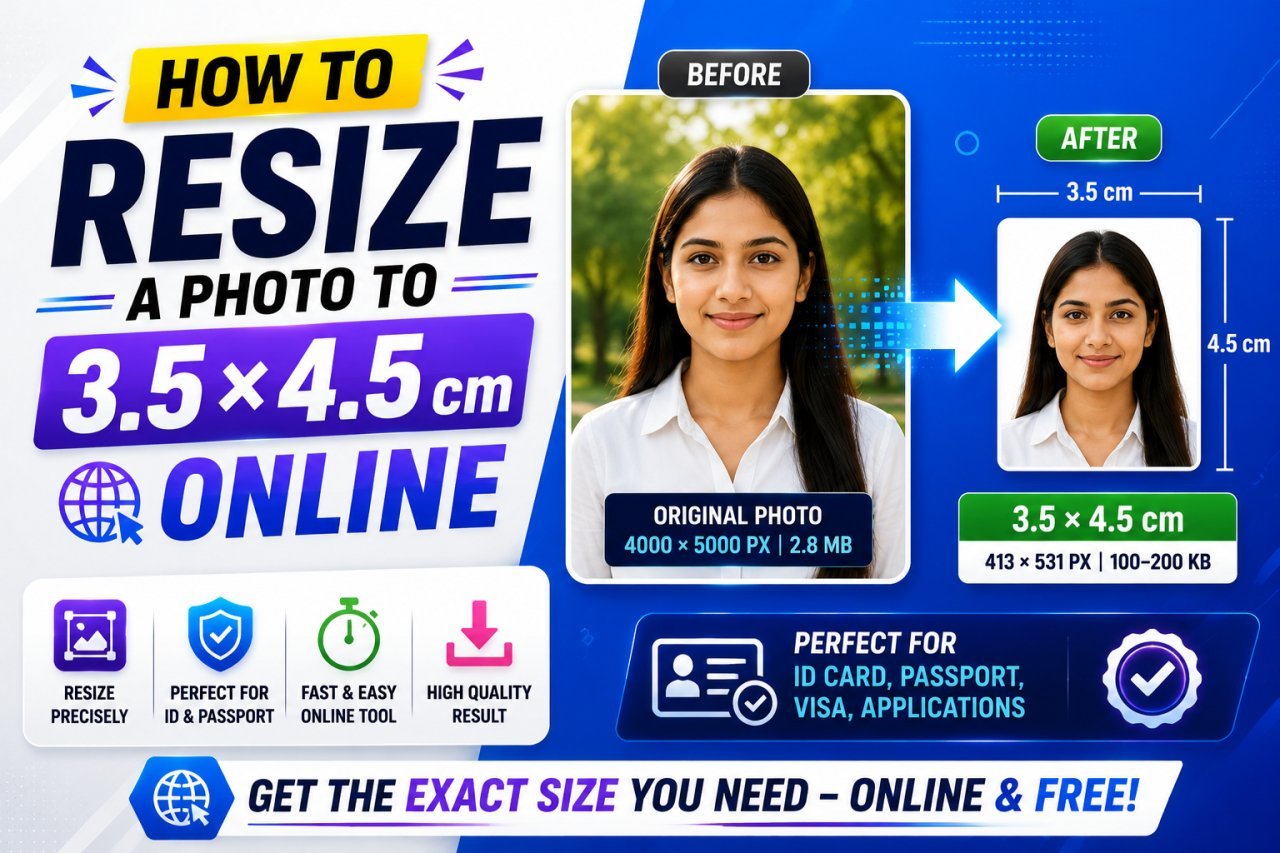
How to Resize a Photo to 3.5 × 4.5 cm Online
Learn how to resize a photo to 3.5 × 4.5 cm online, including pixels, DPI, aspect ratio, file size, cropping, and photo upload requirements.
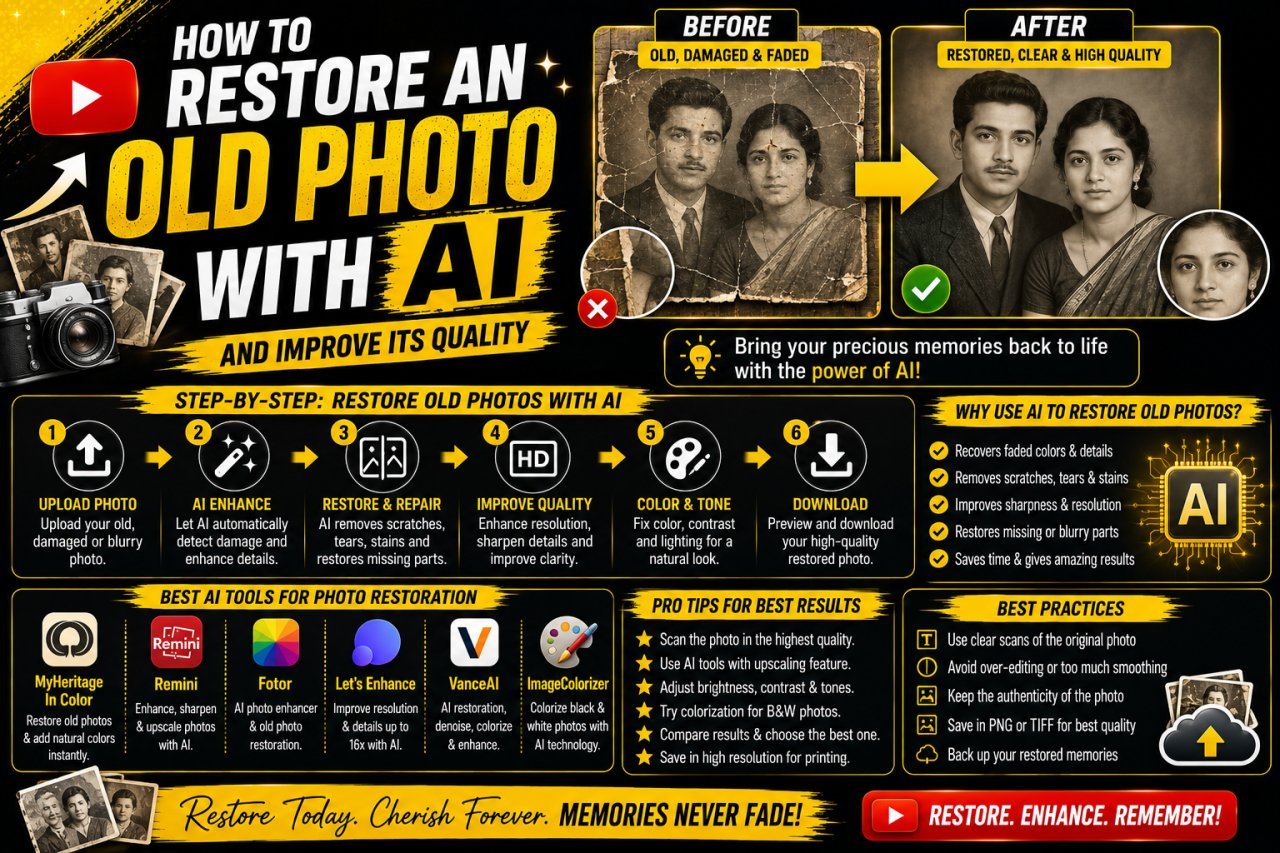
How to Restore an Old Photo With AI: Complete Beginner's Guide
Learn how to restore an old photo with AI by repairing damage, improving clarity, reducing noise, and bringing faded photographs back to life with simple techniques.
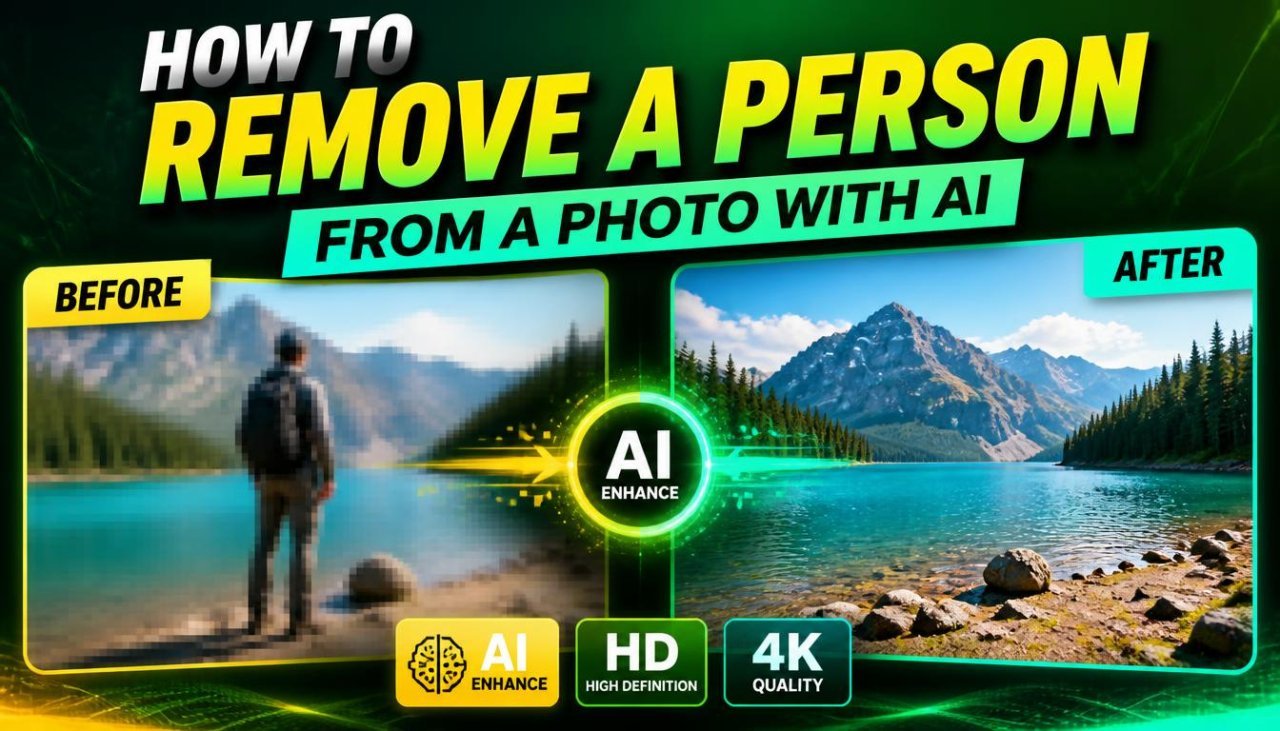
How to Remove a Person From a Photo With AI: Easy Online Guide
Learn how to remove a person from a photo with AI using simple online editing techniques. Discover how AI object removal works, when to use it, and how to get natural-looking results.