
How to Upscale a YouTube Thumbnail Without Making It Blurry
Learn how to upscale a YouTube thumbnail without making it blurry. Discover the right image size, AI upscaling tips, sharpening techniques, and common mistakes to avoid.
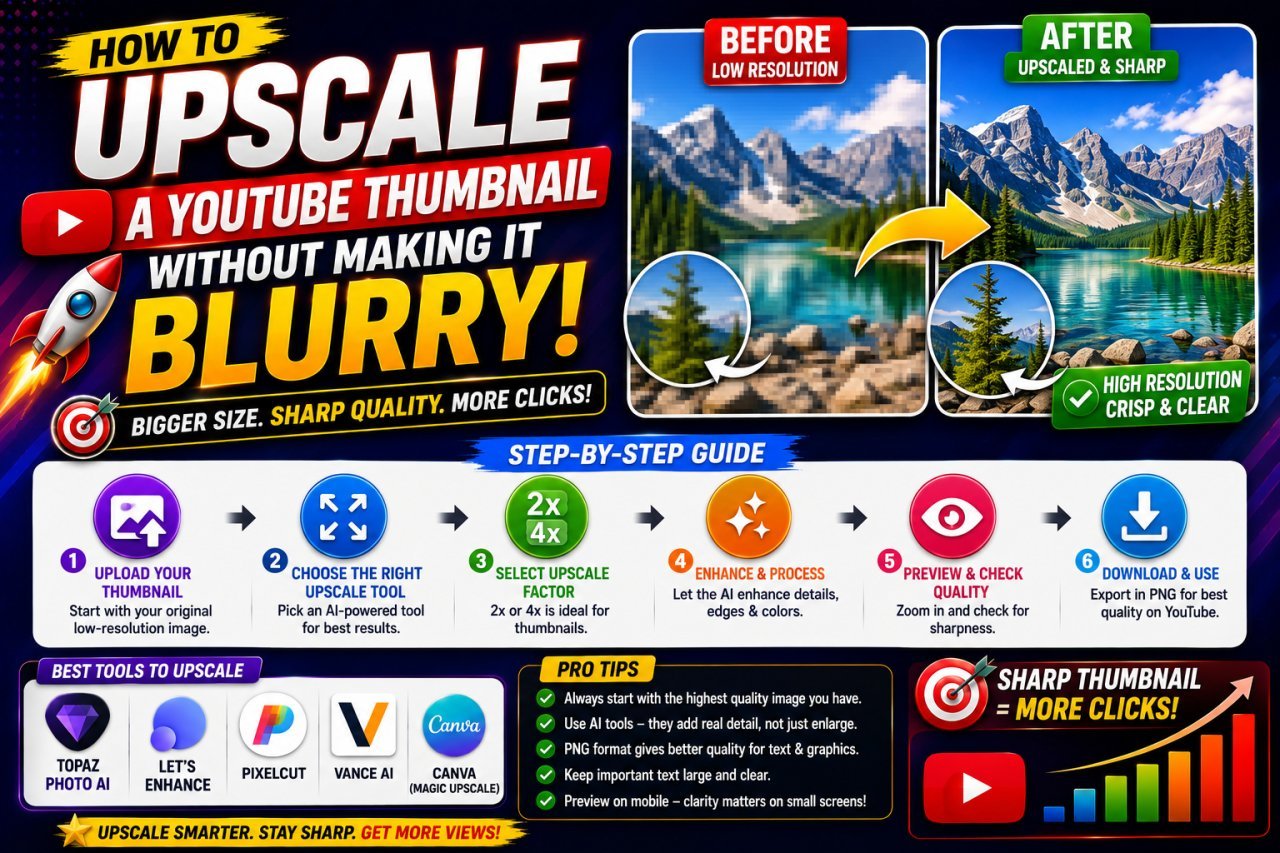
How to Upscale a YouTube Thumbnail Without Making It Blurry
Introduction
A good YouTube thumbnail needs to look clear, sharp, and easy to understand. But sometimes the image you want to use is too small for your thumbnail design.
You may have a low-resolution screenshot, an old thumbnail, a small image downloaded from the internet, or a video frame that does not have enough pixels.
When you simply make that image larger, it can become blurry.
The good news is that you can often improve a small image by using the right upscaling method. The key is to start with the best source available, maintain the correct aspect ratio, upscale carefully, and avoid excessive sharpening.
In this guide, you will learn how to upscale a YouTube thumbnail without making it look blurry or unnatural.
What Does It Mean to Upscale a YouTube Thumbnail?
Upscaling means increasing the dimensions of an image.
For example:
640 × 360 pixels → 1280 × 720 pixels
The second image is larger, but simply increasing the dimensions does not automatically create real detail.
When an image is enlarged, new pixels have to be generated between the existing pixels. Basic resizing methods estimate these pixels, while AI upscaling tools can analyze the image and attempt to reconstruct additional details.
This is why an AI-powered upscaler can sometimes produce a better result than ordinary resizing.
However, upscaling has limits. If the original image is extremely blurry or contains very little detail, no tool can perfectly recover information that was never captured.
Why Does a Thumbnail Become Blurry After Upscaling?
Several things can cause an enlarged thumbnail to lose clarity.
1. The Original Image Is Too Small
A small image contains fewer pixels.
For example, a 320 × 180 image contains far less information than a 1280 × 720 image.
When you enlarge the smaller image, the software has to estimate a large number of new pixels.
2. The Original Is Already Blurry
If the source image is already soft, increasing its dimensions can make the softness more noticeable.
Upscaling can improve the appearance, but it cannot completely restore lost detail.
3. You Use Basic Resizing
Normal resizing can make an image larger without intelligently reconstructing missing details.
This is fine when you only need a simple size change, but it may not be the best solution for a very small thumbnail.
4. The Image Has Compression Artifacts
A heavily compressed JPG may contain blocks, noise, and other artifacts.
When you upscale it, those imperfections can become easier to see.
5. You Over-Sharpen the Image
Some people try to fix blur by increasing sharpening as much as possible.
This can make the thumbnail look worse.
Too much sharpening can create:
- Harsh edges
- White or dark halos
- Extra noise
- Jagged text
- Artificial facial details
The goal should be natural clarity rather than maximum sharpness.
What Size Should a YouTube Thumbnail Be?
A commonly used YouTube thumbnail canvas is 1280 × 720 pixels with a 16:9 aspect ratio.
If your image is smaller but already has the same 16:9 ratio, you can upscale it without changing the composition.
For example:
| Original Size | Target Size |
|---|---|
| 320 × 180 | 1280 × 720 |
| 480 × 270 | 1280 × 720 |
| 640 × 360 | 1280 × 720 |
| 960 × 540 | 1280 × 720 |
You do not need to upscale an image that is already large enough and looks sharp.
Making an image larger simply because you can does not necessarily improve its quality.
Upscaling vs Resizing
Upscaling and resizing are related, but they are not always the same thing.
Resizing
Resizing changes the pixel dimensions of an image.
For example:
800 × 450 → 1280 × 720
The software calculates the new pixels based on the existing image.
AI Upscaling
AI upscaling uses trained models to analyze visual patterns and estimate additional detail.
It may improve:
- Edges
- Textures
- Facial details
- Hair
- Clothing
- Objects
- Background details
AI upscaling is not perfect, but it can be useful when a source image is too small for your intended thumbnail.
The Best Way to Upscale a YouTube Thumbnail
A simple workflow can help you avoid unnecessary quality loss.
Step 1: Find the Best Source
Before using any upscaling tool, look for the highest-quality version of the image.
For example, if you have a 640 × 360 screenshot but can access the original video frame at a higher resolution, use the higher-resolution frame.
A better source usually gives you a better final result.
Step 2: Check the Aspect Ratio
A standard YouTube thumbnail commonly uses a 16:9 layout.
Avoid stretching a 4:3 or square image directly into a 16:9 thumbnail.
Instead, crop it carefully or create a suitable composition.
Step 3: Crop Unwanted Areas
If there is unnecessary space around the subject, crop it before or during the thumbnail design process.
This gives the main subject more visual importance.
Step 4: Upscale the Image
Use an image upscaling tool to increase the resolution.
Try to create the final required dimensions in one step instead of repeatedly resizing the same image.
Step 5: Inspect the Result
Check:
- Face details
- Text
- Object edges
- Hair
- Background
- Fine details
Look for anything that appears unnatural.
Step 6: Sharpen Carefully
If the image still looks slightly soft, apply mild sharpening.
Do not use extreme sharpening.
Step 7: Add Thumbnail Text
If the thumbnail contains text, it is usually better to add important text after the image has been upscaled.
This gives you cleaner and sharper typography.
Step 8: Export the Final Thumbnail
Once the design is finished, export a high-quality version.
You can then compress the final file if necessary.
How ImageEditPro Can Help
If you have a small image that needs to be enlarged, the ImageEditPro AI Image Upscaler can help increase image dimensions while improving the appearance of low-resolution images.
For YouTube-specific work, the YouTube Thumbnail Enhancer can be useful when you want to improve the resolution and sharpness of a thumbnail.
You can also use the Image Resizer when you need to set exact image dimensions.
If the final file is larger than necessary, the Image Compressor can help reduce its file size.
For thumbnails where you want to separate a person or object from its background, the Background Remover can also be useful.
A simple workflow is:
Upscale → Enhance → Resize → Design → Compress → Upload
Why You Should Not Upscale an Image Repeatedly
Suppose your original image is 640 × 360 pixels.
You enlarge it to 800 × 450.
Then you save it.
Later, you enlarge that version to 1000 × 562.
Finally, you enlarge it again to 1280 × 720.
This is not the best workflow.
Instead, use the original source and create the final size directly whenever possible.
Better:
640 × 360 → 1280 × 720
Less ideal:
640 × 360 → 800 × 450 → 1000 × 562 → 1280 × 720
Repeated resizing can introduce additional softness.
Should You Sharpen Before or After Upscaling?
In most cases, check the image after upscaling before deciding whether it needs sharpening.
Upscaling changes the image, so sharpening before enlargement may not give you the final result you want.
A practical workflow is:
Upscale → Inspect → Sharpen lightly if needed
If the image already looks sharp after upscaling, you may not need additional sharpening.
How to Avoid Over-Sharpening
Sharpening should improve clarity without becoming obvious.
Good sharpening
A properly sharpened thumbnail should have:
- Cleaner edges
- Better-defined details
- Readable text
- Natural facial features
Too much sharpening
Over-sharpening can create:
- Bright outlines
- Dark halos
- Rough edges
- Excessive noise
- Artificial-looking faces
If you can immediately notice the sharpening effect, reduce it.
How to Upscale a Thumbnail With Text
Text can be difficult to upscale.
Suppose your original thumbnail contains tiny text that says:
"BEST PHOTO APP"
If the original letters are only a few pixels tall, an upscaler may not be able to reproduce every letter accurately.
Instead of relying on the upscaled text, recreate the text separately.
A better workflow is:
- Upscale the background image.
- Create a new text layer.
- Use a large readable font.
- Add strong contrast.
- Position the text clearly.
- Export the final thumbnail.
This usually produces cleaner results.
How to Upscale a Thumbnail With a Face
Faces need special attention because viewers quickly notice unnatural facial details.
After upscaling, inspect:
- Eyes
- Teeth
- Skin
- Hair
- Eyebrows
- Facial outlines
If the face starts looking different from the original person, the enhancement may be too aggressive.
Use a less aggressive setting or find a better source image.
What If Your Thumbnail Is Extremely Small?
Suppose you only have a 320 × 180 image and want to create a 1280 × 720 thumbnail.
That is a major enlargement.
An AI upscaler may improve the result, but you should have realistic expectations.
The original image simply does not contain the same amount of information as a native 1280 × 720 image.
If possible, look for:
- The original video
- A higher-resolution screenshot
- The original thumbnail
- The original project file
- A higher-quality image source
Finding a better source is often more effective than repeatedly processing a poor image.
AI Upscaling vs Normal Resizing
| Feature | Normal Resizing | AI Upscaling |
|---|---|---|
| Increases image size | Yes | Yes |
| Estimates missing detail | Limited | Yes |
| Useful for simple resizing | Yes | Yes |
| Useful for small images | Limited | Often better |
| Can create artifacts | Yes | Yes |
| Requires quality checking | Yes | Yes |
| Best for detail recovery | Limited | Better suited |
AI upscaling can be helpful, but it should not be treated as a perfect restoration method.
Common Mistakes When Upscaling YouTube Thumbnails
Mistake 1: Starting With the Worst Source
If a higher-resolution version exists, use it.
Mistake 2: Upscaling Too Much
Large enlargements can make limitations in the source more obvious.
Mistake 3: Using Maximum Sharpening
More sharpness does not automatically mean better quality.
Mistake 4: Upscaling Tiny Text
Very small text can become distorted.
Recreate it instead.
Mistake 5: Repeatedly Resizing
Try to create the final size directly from the best source.
Mistake 6: Ignoring Compression
A low-quality JPG can contain artifacts that become more visible after upscaling.
Mistake 7: Checking Only at 100% Zoom
Your thumbnail will normally be viewed much smaller.
Check how it looks at a realistic viewing size.
Practical Example
Imagine you have a 640 × 360 screenshot from a video.
You want to use it as the main image in a YouTube thumbnail.
Step 1: Check the screenshot
Make sure the subject is visible and reasonably sharp.
Step 2: Crop it
Remove distracting areas and focus on the main subject.
Step 3: Upscale it
Increase the image toward 1280 × 720.
Step 4: Inspect the subject
Check the face, clothing, objects, and important edges.
Step 5: Add text separately
Use large, readable text instead of depending on tiny text inside the original screenshot.
Step 6: Improve contrast
Make the main subject stand out from the background.
Step 7: Export
Save a high-quality final version.
Step 8: Compress if necessary
Reduce the file size without heavily damaging the image.
How to Make an Upscaled Thumbnail Look Natural
The best results usually come from moderate editing.
Use the best source available
Do not start with a tiny image if a better version exists.
Avoid excessive enhancement
Heavy processing can create artificial details.
Recreate important text
Typography is usually better when added separately.
Sharpen lightly
Use sharpening only when it improves the image.
Preserve facial identity
Do not allow enhancement to change the appearance of the person.
Keep the background clean
Too much noise or artificial detail can distract from the main subject.
Pros and Cons of AI Upscaling
| Pros | Cons |
|---|---|
| Can enlarge small images | Cannot perfectly recover missing detail |
| Can improve perceived sharpness | May create artificial details |
| Useful for old thumbnails | Tiny text may remain unclear |
| Can be better than basic resizing | Results depend on source quality |
| Saves time compared with rebuilding some images | Excessive enhancement can look unnatural |
When You Should Not Upscale
Upscaling is not always the best answer.
If you have access to the original high-resolution image, use that instead.
You may also be better off rebuilding the thumbnail when:
- The original is extremely blurry.
- Important text is unreadable.
- The image has severe compression artifacts.
- The subject is badly cropped.
- The original project file is available.
- The design is outdated and needs a complete redesign.
Sometimes starting again with better source material is faster than trying to repair a damaged image.
Upscaling vs Recreating the Thumbnail
| Situation | Better Choice |
|---|---|
| Slightly small but clear image | Upscale |
| Small image with good details | AI upscale |
| Tiny blurry text | Recreate text |
| Extremely blurry source | Find a better source |
| Old thumbnail design | Recreate |
| Original high-resolution file available | Use original |
| Slight softness | Upscale + light sharpening |
| Severe compression artifacts | Find a cleaner source |
This simple comparison can save time.
You do not need to spend hours repairing an image when a clean source or new design can solve the problem more effectively.
Best Practices for YouTube Thumbnail Upscaling
Start With the Highest-Quality Source
The source image has a major impact on the final result.
Keep the Correct Aspect Ratio
Avoid stretching the image.
Upscale Only as Much as Needed
Do not enlarge the image unnecessarily.
Add Text at the Final Size
This provides better control over readability.
Check Faces Carefully
Make sure enhancement does not make the person look unnatural.
Sharpen Carefully
Use sharpening as a finishing step rather than a replacement for good source quality.
Compress After Editing
Complete your creative work before final compression.
Keep a Master Copy
Always keep the original or editable version.
Final Comparison
| Method | Quality Potential | Best Use |
|---|---|---|
| Basic resizing | Moderate | Simple size changes |
| AI upscaling | High, depending on source | Small images |
| Light sharpening | Useful | Slight softness |
| Recreating the thumbnail | Very high | Poor or outdated thumbnails |
| Finding the original source | Best | When available |
The source image remains one of the most important factors.
A good source combined with careful upscaling can produce a clean thumbnail.
A severely damaged source may still look imperfect after enhancement.
Final Thoughts
If you want to upscale a YouTube thumbnail without making it blurry, avoid simply stretching the image and hoping for the best.
Start with the highest-quality source available. Keep the correct aspect ratio, use an appropriate upscaling method, and inspect the result carefully.
If the image is still slightly soft, light sharpening can help. But avoid aggressive sharpening because it can create unnatural edges and artificial details.
For thumbnails containing small text, recreate the text after upscaling whenever possible.
Most importantly, remember that upscaling cannot perfectly recover information that was never captured. It can estimate and improve missing details, but the quality of your original source still matters.
A reliable workflow is:
High-quality source → Crop → Upscale → Check → Light sharpening → Add text → Compress → Export
With this approach, you can turn a smaller image into a much more usable YouTube thumbnail without making it unnecessarily blurry or artificial.
Frequently Asked Questions
1. How can I upscale a YouTube thumbnail without making it blurry?
Start with the highest-quality source available and use an AI image upscaler instead of simply stretching the image. After upscaling, inspect the result and apply only light sharpening if necessary.
2. What size should a YouTube thumbnail be?
A commonly used YouTube thumbnail size is 1280 × 720 pixels with a 16:9 aspect ratio. Check YouTube's current specifications before publishing because platform requirements can change.
3. Can I upscale a 640 × 360 thumbnail to 1280 × 720?
Yes. A 640 × 360 image can be enlarged to 1280 × 720 while maintaining the 16:9 aspect ratio. An AI upscaler may produce a better result than basic resizing.
4. Does AI upscaling remove blur?
AI upscaling can improve the perceived clarity of some low-resolution images, but it cannot perfectly restore information that was never captured. A severely blurry source may still have visible limitations.
5. Should I sharpen a thumbnail after upscaling?
You can apply light sharpening if the image still looks slightly soft. Avoid excessive sharpening because it can create halos, noise, and unnatural edges.
6. Can I upscale a YouTube thumbnail with text?
Yes, but tiny text may not upscale cleanly. If possible, recreate important text separately at the final thumbnail size instead of enlarging very small text already embedded in the image.
7. Is AI upscaling better than normal resizing?
AI upscaling can be more useful when a small image needs additional detail, while normal resizing is suitable for straightforward dimension changes. The final result depends heavily on the original source.
8. Why does my thumbnail look artificial after upscaling?
The enhancement may be too aggressive, causing the software to create unnatural-looking details. Try a less aggressive setting or start with a higher-quality source.
9. Can I upscale a blurry video screenshot for a YouTube thumbnail?
Yes, but the final quality depends on the original screenshot. If possible, capture a clearer frame from the original video before using an upscaling tool.
10. What is the best way to improve a low-resolution YouTube thumbnail?
Use the highest-quality source available, upscale it carefully, inspect important details, apply light sharpening if needed, recreate small text, and export the final thumbnail at an appropriate size.
Ready to optimize your images?
Every tool mentioned in this article is free to use. No upload, no signup, and no watermarks — ever.
Try our free toolsRelated articles

How to Turn a Video Screenshot Into a YouTube Thumbnail
Learn how to turn a video screenshot into a YouTube thumbnail using the right frame, cropping, sharpening, text, contrast, and image optimization techniques.
How to Compress a YouTube Thumbnail Without Losing Quality
Learn how to compress a YouTube thumbnail without losing quality using the right dimensions, file format, compression settings, and simple image optimization techniques.

How to Make a YouTube Thumbnail That Gets More Clicks
Learn how to make a YouTube thumbnail that gets more clicks with better design, readable text, strong visuals, color contrast, and simple thumbnail optimization techniques.